Any links to online stores should be assumed to be affiliates. The company or PR agency provides all or most review samples. They have no control over my content, and I provide my honest opinion.
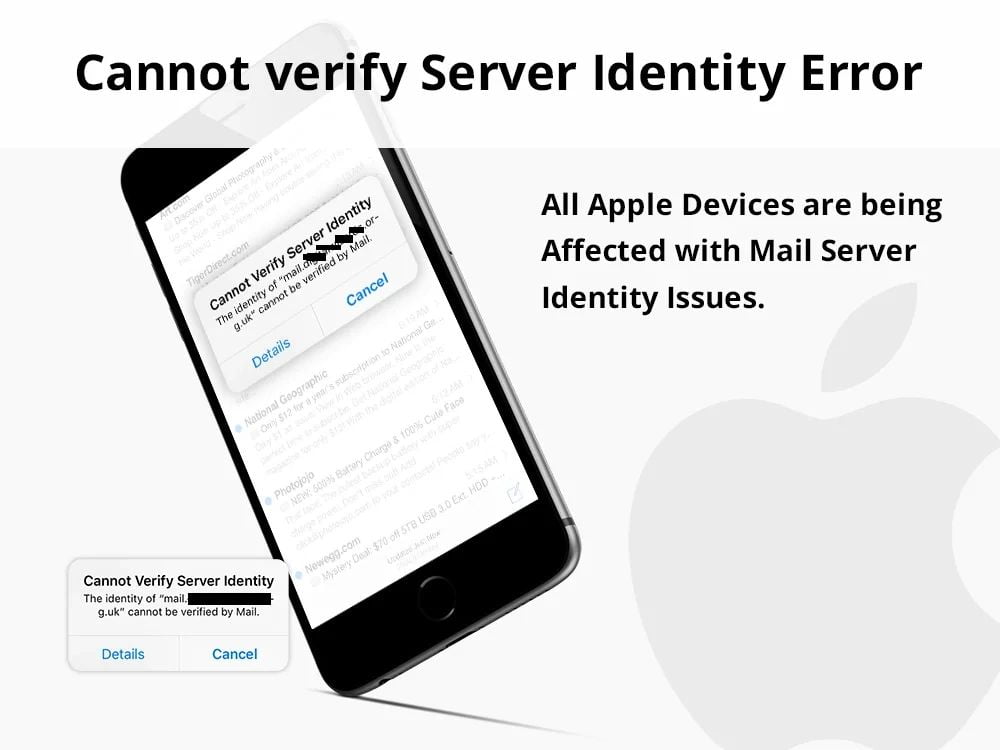
The “Cannot Verify Server Identity” error on the iPhone usually appears when there’s an issue with an SSL certificate or the server’s identity for services like email, Wi-Fi, and other apps that use SSL/TLS for secure communication.
This is also a common problem with emails on the iPhone as Apple tries and force you to use secure emails.
This issue was quite common a few years ago, back when I used to do freelance work for a web design company. They provided email services using their own servers, and these would often lack a proper SSL certificate. Around four years ago, Apple started displaying this warning whenever an email was not secured with SSL.
It is less of a problem nowadays because most websites use SSL due to the warnings you get with Google. You also have services like Lets Encrypt that can supply SSL certificates free of charge.
What Does Cannot Verify Server Identity Error Mean on iPhone?
The “Cannot Verify Server Identity” error is the iPhone’s way of warning you that there might be a potential security risk. Here’s what could cause this error:
- Expired SSL Certificate: If the server’s SSL certificate has expired, the iPhone will not be able to verify its authenticity, leading to this error.
- Mismatched Domain: The error can occur if the domain name on the certificate doesn’t match the domain name of the server you’re trying to connect to.
- Untrusted Certificate Authority (CA): Certificates are issued by entities called Certificate Authorities. If the certificate is from a CA that’s not trusted or recognized by the iPhone, this error might appear.
- Network Issues: Sometimes, a poor or unstable network connection can cause the error.
- Date and Time Settings: If your iPhone’s date and time are incorrect, it can prevent the device from verifying the server’s identity, especially if the date is set to a time before the certificate was issued or after it expired.
- Interception or Man-in-the-Middle Attack: Although less common, it’s possible (especially on public Wi-Fi networks) for malicious entities to intercept communication between your device and the server. This can lead to the error if they’re trying to present a false certificate.
- Server Configuration Issues: The server might be misconfigured, leading to issues with how it presents its SSL certificate.
How to Resolve Does Cannot Verify Server Identity Error
- Check Your Date & Time Settings: Go to Settings > General > Date & Time. Ensure the settings are correct.
- Trust the Certificate (Caution): If you are certain the connection is secure (like when you’re connecting to a known corporate network), you might have the option to trust the certificate manually. However, exercise caution and avoid doing this for unfamiliar networks or services.
- Forget and Rejoin the Network: If you’re connecting to Wi-Fi, try forgetting the network and then reconnecting.
- Reset Network Settings: Go to Settings > General > Reset > Reset Network Settings. This will erase all saved Wi-Fi networks, VPN settings, and other network-related settings.
- Contact the Service Provider: If it’s an email or another service giving the error, contact the provider or administrator. They may be aware of the issue and offer a solution.
How to fix SSL warnings for emails on the Apple iPhone & iPad

- Verify the Server’s SSL Certificate:
- Ensure the email server’s SSL certificate is valid, not expired, and issued by a trusted certificate authority. If you have control over the server or the email service, consider renewing or getting a certificate from a reputable source.
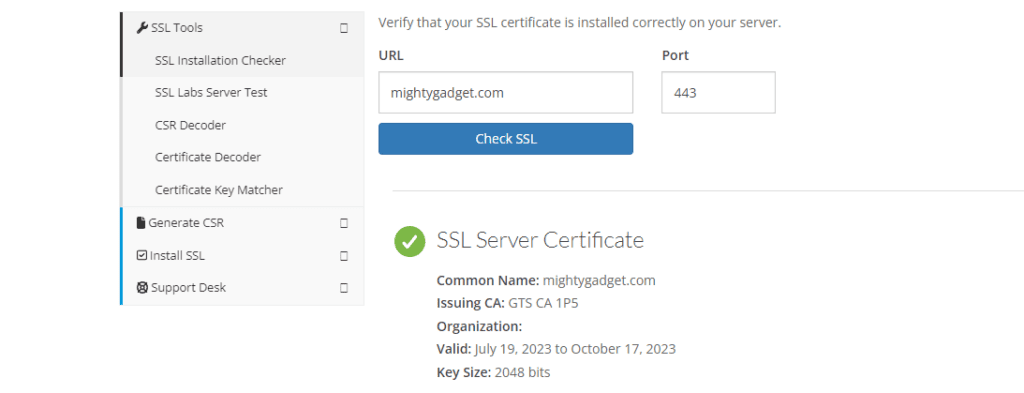
- There are various online tools available that can check an SSL certificate for you. They’ll fetch the certificate and validate it, checking for common issues. Some popular options include:
- SSL Labs
- DigiCert SSL Tool
- GeoCerts SSL Checker
- Simply enter the domain you want to check, and the tool will give you a detailed analysis of the SSL certificate and its configuration.
- Review Server Settings:
- Go to Settings > Mail > Accounts.
- Tap on the email account that’s showing the SSL warning.
- Tap Account at the top.
- Under “Incoming Mail Server”, check the details:
- Host Name (e.g., imap.yourdomain.com)
- Username
- Password
- Tap Advanced at the bottom.
- Ensure “Use SSL” is on.
- Confirm the server port is correct (usually 993 for IMAP and 995 for POP3).
- Go back to the previous screen and tap SMTP under “Outgoing Mail Server”.
- Tap the primary server listed.
- Ensure “Use SSL” is on.
- Confirm the server port is correct (usually 465 or 587).
- Re-enter Email Password:
- Sometimes, simply re-entering the email password can resolve the issue. There should be a field in the account settings to input the password for both incoming and outgoing servers.
- Delete and Re-add the Email Account:
- If the warning persists, you might consider deleting the email account from your iPhone and then re-adding it. This can often fetch the correct settings from the server automatically.
- Go to Settings > Mail > Accounts.
- Tap on the problematic email account, then tap Delete Account.
- Once deleted, return to Accounts and tap Add Account to set up the email account again.
- If the warning persists, you might consider deleting the email account from your iPhone and then re-adding it. This can often fetch the correct settings from the server automatically.
- Update Your iPhone:
- Outdated iOS versions might contain bugs or compatibility issues. Check for updates by going to Settings > General > Software Update.
- Reach Out to Your Email Provider:
- If you’re still having difficulty, it might be beneficial to contact your email service provider or IT department (if it’s a corporate email). They may provide specific guidance or be aware of existing issues with their servers.
It is worth noting that you should try and avoid troubleshooting email issues like this if you are on a public Wi-Fi network, as this can be insecure and expose sensitive information. It could also be contributing to the problem.
Christopher Carter, a committed contributor to Mighty Gadget, balances his full-time job as a Royal Mail postman with his enduring passion for gaming. With a particular penchant for PC, SteamDeck, and PS5 platforms, Chris provides a unique perspective on the latest gaming trends and hardware. His close friendship with our chief editor, spanning two decades, has fostered a rich collaborative environment where his gaming insights are highly valued.
When he’s not immersed in the digital realms or diligently delivering mail, Chris is cheering for Manchester City, showcasing his unwavering support come rain or shine. Besides football, his world revolves around his young son and two lively beagles, who provide a joyful respite from his daily pursuits.
Chris’s contributions to Mighty Gadget are crafted during his spare hours, where he meticulously delves into the gaming world, translating his experiences into engaging reviews for our readers. His authentic take on the latest gaming endeavours makes him a trusted voice within the Mighty Gadget community. Through his writings, Chris offers a genuine glimpse into the gamer’s world, making him an integral part of our team.


Many people do not realize, or have forgotten, that there are generally TWO certificates for a domain: one for the webserver and one for the email server. It is important that both are secure and kept up-to-date.
Few sites target the email side of things. One that shows lots of technical info is CheckTLS.com.