Any links to online stores should be assumed to be affiliates. The company or PR agency provides all or most review samples. They have no control over my content, and I provide my honest opinion.
When a new external hard drive from Seagate, Western Digital, Toshiba or Samsung is purchased, most of time it is initially formatted with FAT file system. However, some Windows users will format it to NTFS later. However, they find a Windows NTFS-formatted external hard disk read-only after they move to a Mac. That is to say, the files on the NTFS drive can be viewed and moved out but they cannot be deleted, renamed, modified or converted.
Generally speaking, there are two ways to solve the problem to gain full read-write access to NTFS drives on Mac.
- Use NTFS for Mac software
- Enable native NTFS write support on Mac
Use NTFS for Mac software
When a device is attached to a computer for use, the operating system will mount it and make its files and directories available for users. Normally, the disk will be readable and writable. But file system incompatibility may fail the mounting process to make the disk not writable.
In this case, a third-party driver can be installed to work as a bridge between the Apple macOS and the Microsoft NTFS file system. When an NTFS device is detected by the Mac computer, the NTFS for Mac software instead of the macOS helps mount the drives in read-write mode automatically. Users can directly read and write to NTFS drives with it.
Step 1: Download iBoysoft NTFS for Mac and install it on your Mac. The driver works on Mac OS X 10.8 to macOS 10.15.
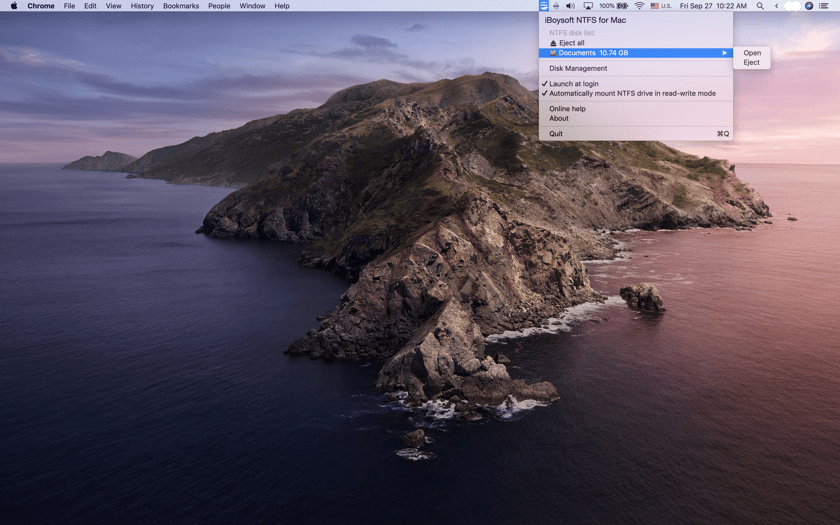
Step 2: Plug in your NTFS drives to the Mac. If the external hard drive needs extra power, remember to charge it.
Step 3: Write to the NTFS-formatted volumes directly after the drive is successfully mounted in read-write mode.
Enable native NTFS write support on Mac
Besides the complicated command lines, the method of enabling Mac’s NTFS write support is not recommended because it is experimental and little tested. It may cause serious disk damage or data loss during the writing.
But if you insist this is what you want to try, here are the detailed instructions.
Step 1: Launch Terminal through Launch Pad and Other.
Step 2: Copy and paste the command sudo nano /etc/fstab to edit the fstab file.

Step 3: Input your admin password when asked and hit Enter. Don’t be surprised if you don’t see any numbers or letters during the typing.
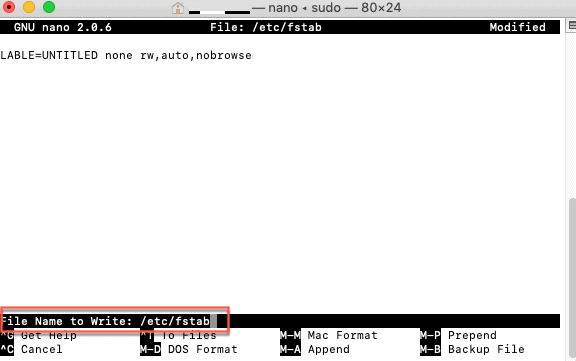
Step 4: Copy and paste the command LABEL=VOLUM_NAME nono ntfs rw,auto,nobrowse and hit Enter. Change the VOLUME_NAME to the name of your external hard drive. If you have multiple NTFS drives/volumes to write, write different line for each of them. Then hit Enter.
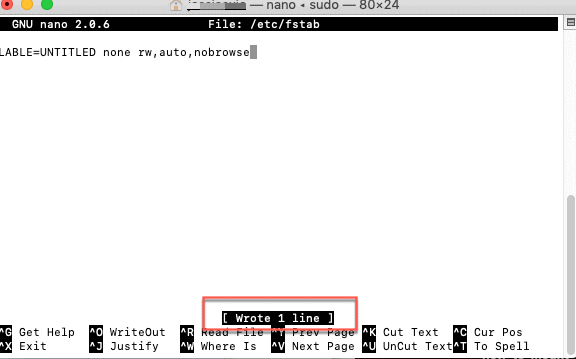
Step 5: Press Control + X to exit the editing.
Step 6: Safely eject the NTFS drive and reconnect it to the Mac.
Step 7: Click Go at the menu bar where Apple logo is and select Go to Folder.
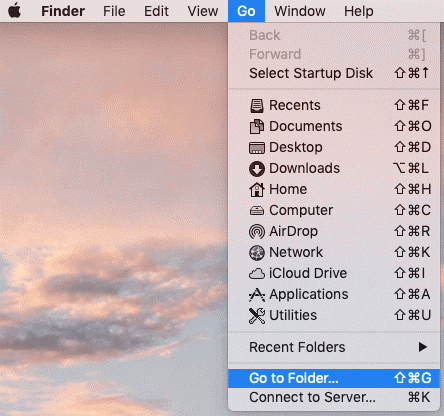
Step 8: Type in /Volumes and hit Enter.
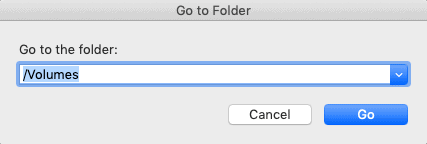
Step 9: Find the volumes with NTFS file system and drag it to the section of Favorites or Locations for easy access.
If you want to redo the change, you need to open the fstab file and delete the command you entered and hit Enter to save the deletion. Then press Control + X to exit.
I want to remind again. You will see this method a lot especially on YouTube channels, but nearly nobody will tell you that the method is full of flaws and you may lose your data. For the sake of your important data, you had better to use NTFS drivers. If you just want to see how this method works, follow the steps carefully above.
Conclusion
When people come to read and write to NTFS drives on Mac, many of them will choose to back up files and reformat the drive. However, it is not convenient if there are a lot of files that need to move out and back in. For a cross-platform worker, the best wat to solve the incompatibility is to install drivers. In this NTFS not writable on Mac situation, using an NTFS driver is obviously easier and safer.
I am James, a UK-based tech enthusiast and the Editor and Owner of Mighty Gadget, which I’ve proudly run since 2007. Passionate about all things technology, my expertise spans from computers and networking to mobile, wearables, and smart home devices.
As a fitness fanatic who loves running and cycling, I also have a keen interest in fitness-related technology, and I take every opportunity to cover this niche on my blog. My diverse interests allow me to bring a unique perspective to tech blogging, merging lifestyle, fitness, and the latest tech trends.
In my academic pursuits, I earned a BSc in Information Systems Design from UCLAN, before advancing my learning with a Master’s Degree in Computing. This advanced study also included Cisco CCNA accreditation, further demonstrating my commitment to understanding and staying ahead of the technology curve.
I’m proud to share that Vuelio has consistently ranked Mighty Gadget as one of the top technology blogs in the UK. With my dedication to technology and drive to share my insights, I aim to continue providing my readers with engaging and informative content.


