Any links to online stores should be assumed to be affiliates. The company or PR agency provides all or most review samples. They have no control over my content, and I provide my honest opinion.
I have previously reviewed the Reolink Duo PoE, Duo 4G and the Reolink Duo 2 WiFi and have been impressed with all of them.
The original Reolink Duo was a fantastic concept but was let down slightly by using two separate camera feeds. The Reolink Duo 2 fixed this issue and stitched the two feeds together to create an almost perfect image with a 180° field of view and a resolution of 4608 x 1728px.
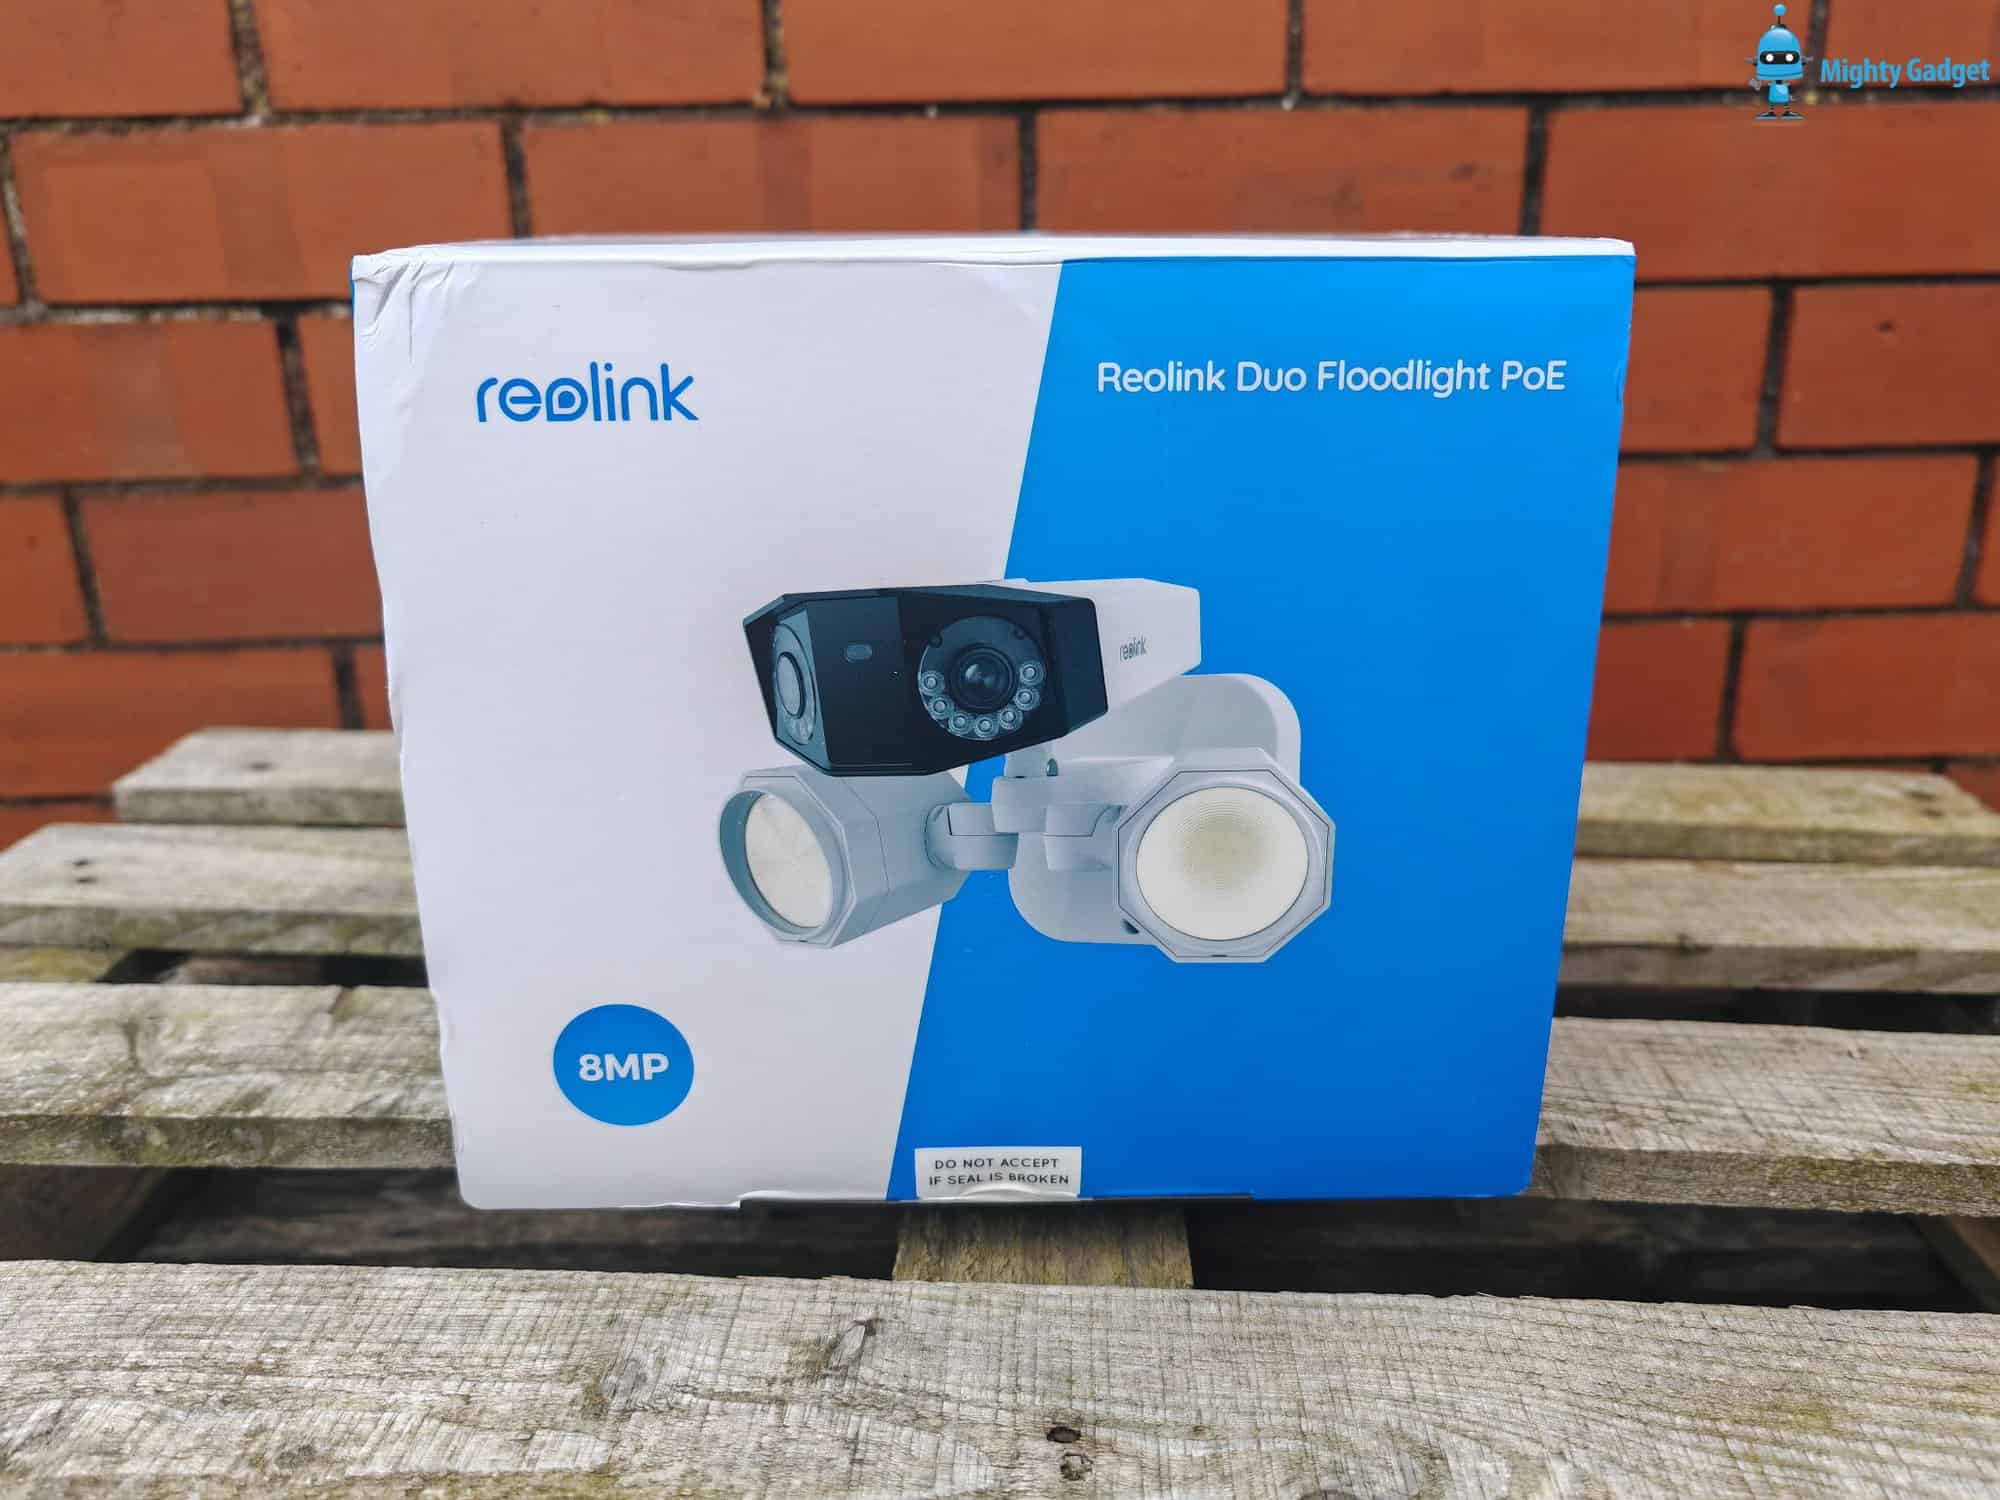
The Reolink Duo Floodlight is the same as the Duo 2, but you now have the floodlight attachment that helps provide superior recordings when it is dark and the improved security a floodlight offers.
Specification
| Model | Reolink Duo Floodlight PoE |
|---|---|
| Image Sensor | 1/2.7" CMOS Sensors |
| Video Resolution | Default: 4608X1728 (8.0 megapixels) at 20 frames/sec |
| Lens | f = 3.2 mm fixed, F = 2.0 |
| Video Format | H.265 |
| Field of View | Horizontal: 180° |
| Vertical: 60° | |
| Day & Night | Auto-switching with IR cut filter |
| Infrared Night Vision | 30 meters (LED: 14pcs/20mil/850nm) |
| Color Night Vision | Floodlight: 40pcs SMD LEDs/15W/4200K/1800 Lumens |
| Audio | Two-way audio |
| POE | IEEE 802.3at, 48V Active |
| DC Power | DC 12V⎓1.7A, <24W |
| Power | DC power port |
| System | Reset button |
| Ethernet | One 10M/100Mbps; RJ45 |
| Storage | Micro SD card slot (Max. 256GB) |
| Audio | Built-in microphone and speaker |
| Frame Rate | Mainstream: 4fps - 20fps (default: 20fps) |
| Substream: 4fps - 20fps (default: 10fps) | |
| Code Rate | Mainstream: 3072-10240Kbps (default: 8192kbps) |
| Substream: 256-2048Kbps (default: 1024kbps) | |
| Browser Supported | Edge, Chrome, Firefox, Safari |
| OS Supported | PC: Windows, Mac OS; Smartphone: iOS, Android |
| Smart Alarm | Motion detection; person detection; vehicle detection; pet detection |
| Record Mode | Motion-triggered recording (default); scheduled recording |
| Protocols & Standards | HTTPS, SSL, TCP/IP, UDP, HTTP, IPv4, UPnP, RTSP, RTMP, SMTP, NTP, DHCP, DNS, DDNS, FTP, P2P |
| Maximal User Access | 20 Users (1 admin account & 19 user accounts); Supports up to 12 simultaneous video streams (10 substreams & 2 |
| Works with | Google Assistant |
| Temperature | Operating temperature: -10°C~+50°C (14°F~122°F) |
| Humidity | Operating humidity: 10% ~ 90% |
| Waterproof | IP66 |
| Dimension | 243x210x151 mm |
| Weight | 1.25kg |
| Limited Warranty | 2-year limited warranty. For support, visit https://support.reolink.com/hc/en-us/ |
Reolink Duo Floodlight vs Duo 2 vs Due Differences
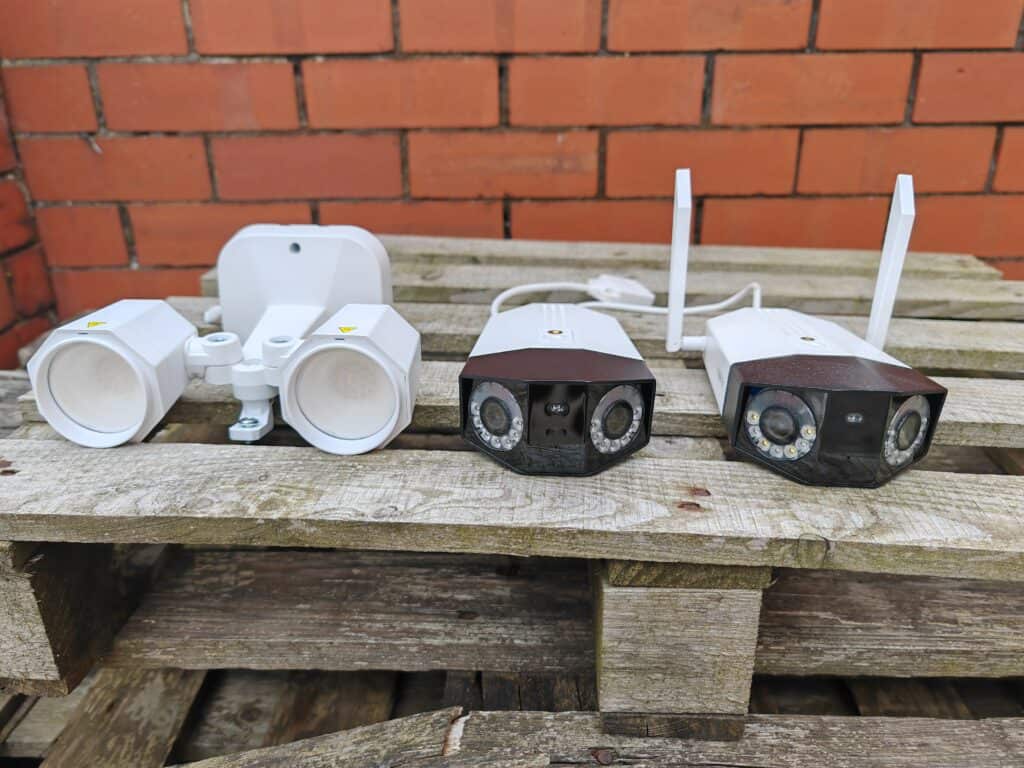
To understand the improvements and differences in the Reolink Duo Floodlight PoE, it’s worth comparing it to the previous models.
The Reolink Duo Floodlight is essentially the same as the Due 2, but with the attached floodlight:
- One-Stream Stitched Image: Unlike its predecessors, the Reolink Duo Floodlight PoE now displays a single stream for both cameras, with the images automatically stitched together. This provides a seamless viewing experience and eliminates the need for manual image stitching within the app.
- Increased Field of View: The Reolink Duo Floodlight PoE offers a wider field of view, with a horizontal angle of 180° vs 150° and a vertical angle of 60° vs 44°. This expanded perspective allows for better coverage of your property.
- Enhanced Night Vision: With the addition of extra infrared LEDs, the Reolink Duo Floodlight PoE provides improved night vision capabilities, allowing you to see up to 30 meters in complete darkness.
- H.265 Video Format: The camera now uses the H.265 video format, which offers higher compression efficiency and better video quality compared to the previous H.264 format.
Unboxing / Installation
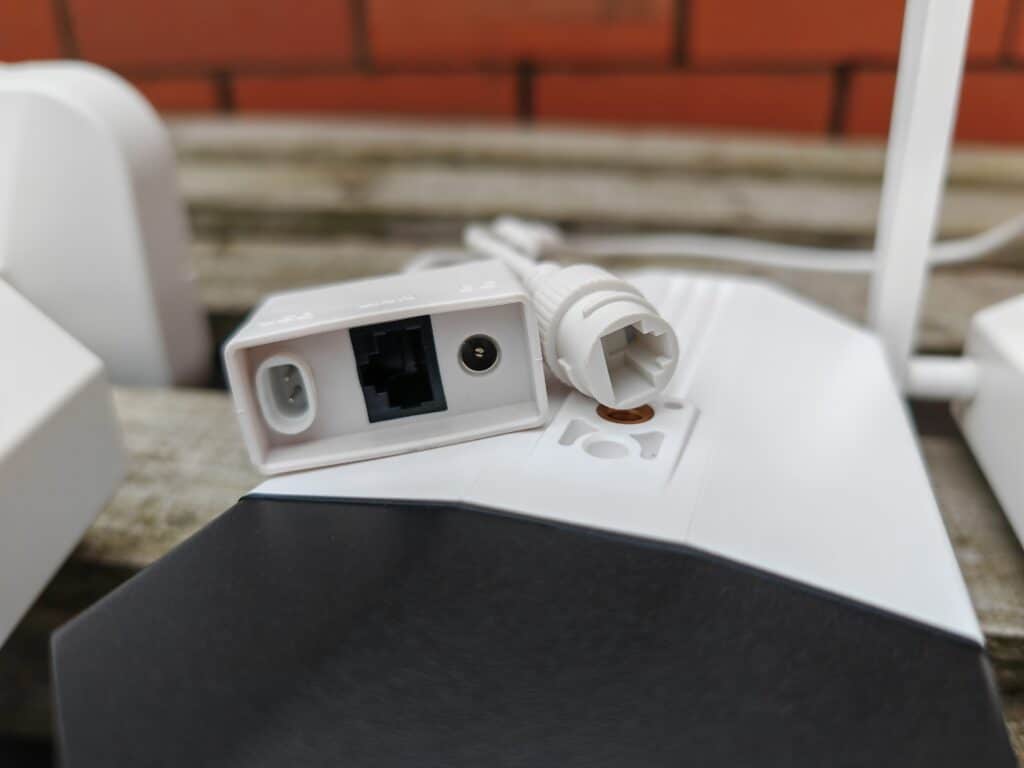
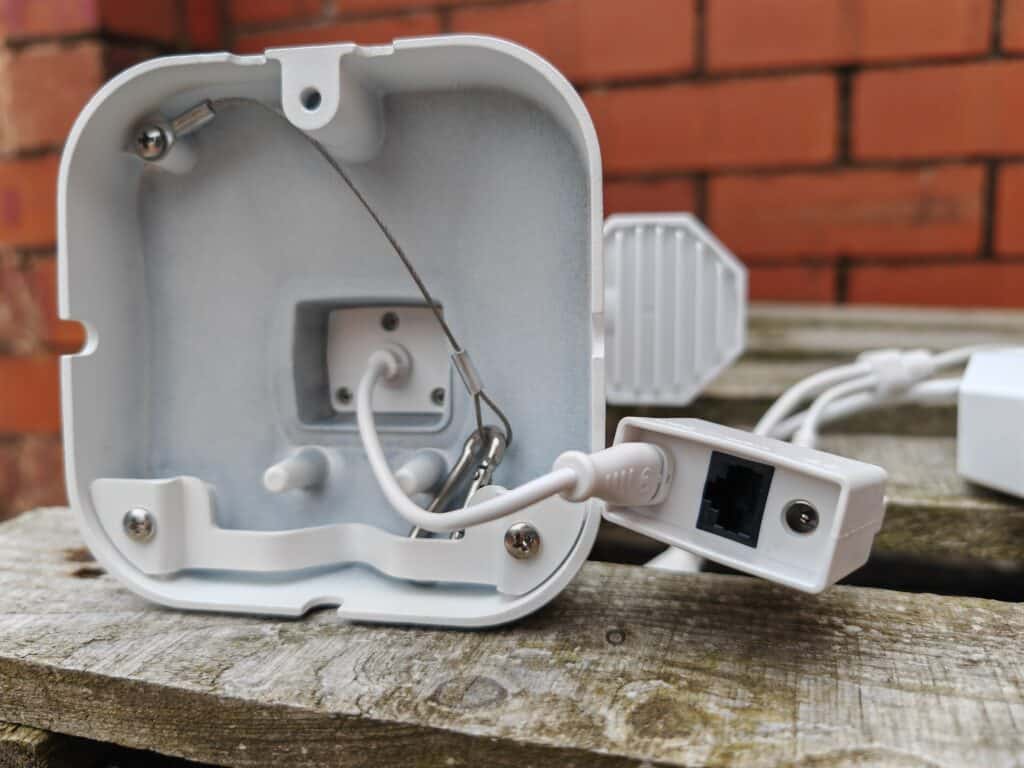
The Reolink Duo Floodlight PoE comes with everything you need for a straightforward installation process. In the box, you will find the camera itself, mounting accessories, an Ethernet cable, and a quick start guide.
To begin the installation, you will first need to choose an ideal location for the camera. It is recommended to mount the camera at a height that provides a clear view of the desired surveillance area. Once you have selected the location, use the included mounting accessories to secure the camera in place.
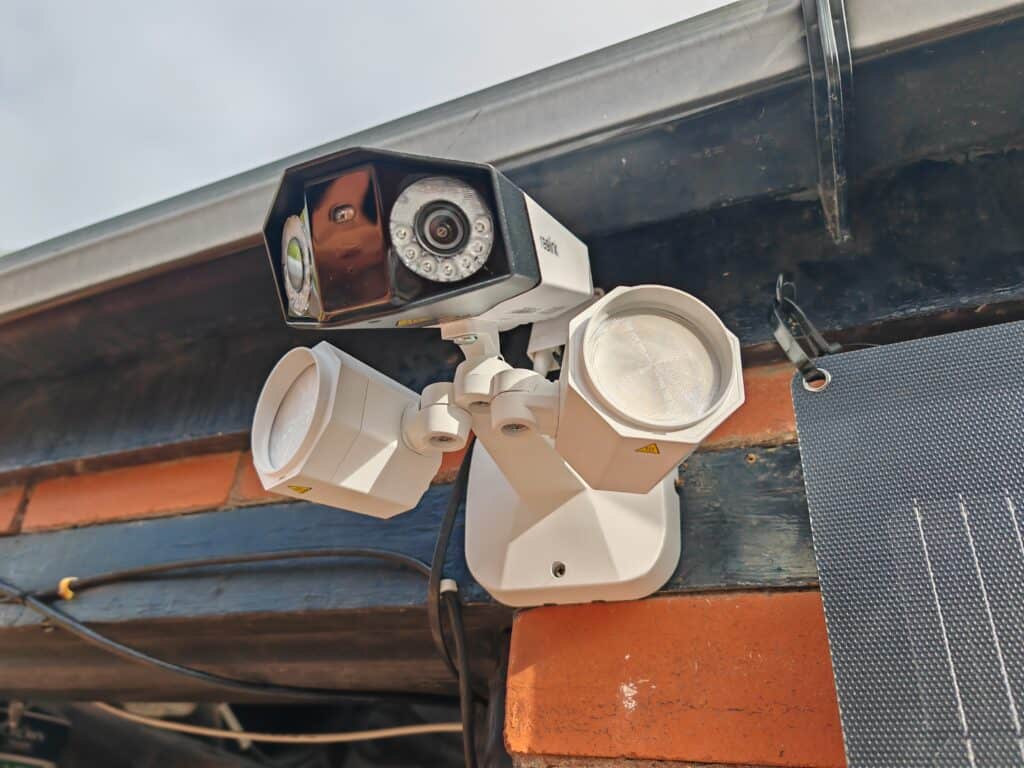
As you would expect, the installation is a bit different than the previous models. With this camera, you have a backplate that screws into your wall, then the floodlight slots on top. You then secure the floodlight with a single screw.
The camera then mounts on top of the floodlight.
One of the big differences is the connections. Normally, you have a PoE ethernet port and DC port on the end of a reasonably long cable. With this, there is now a rectangular box with input from the floodlight, then the PoE port. The one problem I found was that the connector from the flood light to this is quite short, and it is, therefore, a bit harder to tidy up and weatherproof.
I just tucked it under my gutter and wrapped it up with some tape for the review period. Not an ideal solution. Assuming I leave it in place, I will have to buy a weatherproof junction box to protect it.
Set Up
Once the physical installation is complete, it’s time to set up and configure the Reolink Duo Floodlight PoE camera. This can be done through the Reolink app, which is available for both Android and iOS devices.
Start by downloading the Reolink app from the respective app store and creating an account. Once you have logged in, follow the on-screen instructions to add a new device. The app will guide you through the process of connecting the camera to your network and setting a password for the device.
The overall process was identical to all the other Reolink cameras.
PoE Power Requirement
One thing that caught me out with this camera is that the PoE specification is for IEEE 802.3at which is often referred to as PoE+, and this is rated for up to 25.5W. Considering this is a floodlight camera it makes perfect sense that this camera requires a higher power output than the standard IEEE 802.3af, which is rated for up to 15.4 W.
I initially had this plugged into my Engenius ECS1008P, which can only do 802.3af. When the floodlight kicked it, the whole camera would get disconnected and reboot. Switching to the Zyxel Nebula NSW100-10 resolved the problem.
Blue Iris / NVR Integration
If you prefer to use a third-party NVR (Network Video Recorder) software such as Blue Iris or a Reolink NVR, the Reolink Duo Floodlight PoE is compatible with these systems. Integration with Blue Iris or a Reolink NVR allows for centralised management and recording of multiple cameras.
To integrate the camera with Blue Iris, you will need to enable the RTSP/ONVIF feature in the camera’s network settings. Once enabled, you can add the camera to your Blue Iris software using the provided RTSP URL. This allows you to access and control the camera’s live feed and recordings within the Blue Iris interface.
I don’t have a Blue Iris server anymore, but the format of the RTSP feed should be:
rtsp://admin:password@192.168.xx.xx:554/h265Preview_01_main
And for the sub stream, it is:
rtsp://admin:password@192.168.xx.xx:554/h264Preview_01_sub
Similarly, if you have a Reolink NVR, you can add the Reolink Duo Floodlight PoE to your NVR system using the device’s unique ID. This enables seamless integration and recording of the camera’s footage alongside your other Reolink cameras.
Just like the Reolink Due 2, this only takes up one feed for your chosen NVR.
In Use / App
Motion Detection
The Reolink Duo Floodlight PoE offers advanced motion detection capabilities, allowing you to customise and fine-tune the camera’s sensitivity and detection zones. The camera can detect all types of motion, including people, vehicles, and pets (beta feature).
You can also minimise false alerts by setting up detection zones and defining the amount of time an object needs to be detected before triggering the alarm and the size of the object.
Using the Reolink app, you can configure the camera to send push notifications and email alerts whenever motion is detected. You can also specify the types of motion events you want to be notified about, ensuring that you only receive relevant alerts.
Additionally, the camera supports alarm scheduling, allowing you to set specific times during which motion detection and floodlight activation should be enabled. This feature is particularly useful for conserving energy during daylight hours or when motion detection is not required.
With the basic settings, I don’t find Reolink as accurate as Eufy, and there is no facial detection. However, I think if you experiment with the settings, you could improve the overall accuracy. Reolink also has the benefit of 24/7 recording, which brands like Eufy lack.
Day Time Footage
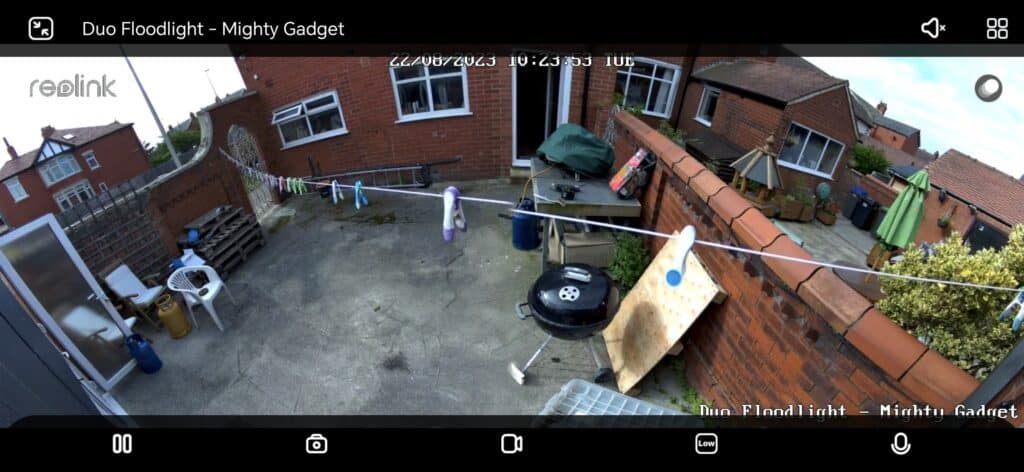
During the day, the Reolink Duo Floodlight PoE captures clear and detailed footage thanks to its 8-megapixel resolution and wide field of view. The camera’s lenses are digitally stitched together, providing a seamless 180° horizontal perspective and a 60° vertical view.
Whether you’re monitoring your front yard, driveway, or any other area, you can expect sharp and vibrant visuals. The Reolink Duo Floodlight PoE’s image quality remains consistent even in challenging lighting conditions, ensuring that you don’t miss any important details.
Night Time Footage
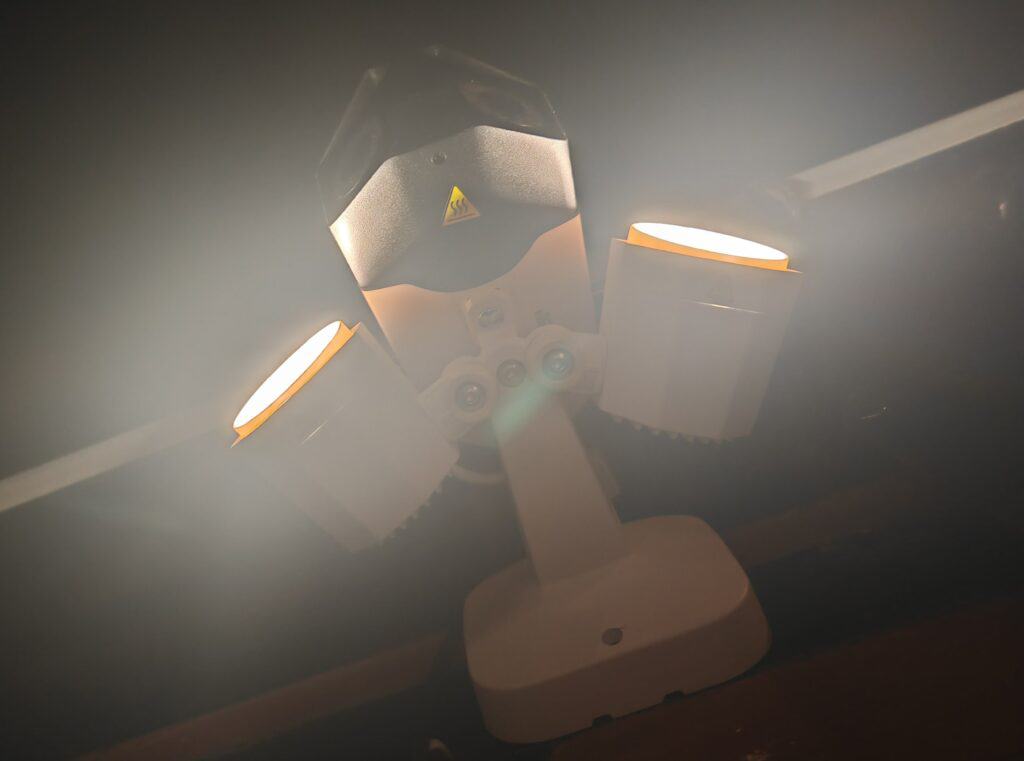
At night, the Reolink Duo Floodlight PoE excels in providing reliable surveillance thanks to its enhanced night vision capabilities. The camera is equipped with infrared LEDs that illuminate the scene, allowing you to see up to 30 meters in complete darkness.
The combination of the infrared LEDs and the powerful floodlights ensures that your property is well-lit and visible during the night. This provides an added layer of security and allows for better identification of people and objects in the vicinity of the camera.
Within the app, you can set how you want the floodlight to work. As the light is located in my secure back garden, I have it set to smart mode and only triggers when it detects a human. An alternative option would be to have the light switch on based on a schedule.
Price and Alternative Options
The Reolink Duo Floodlight PoE camera is available from Amazon for just £132. The WiFi variant is a bit more expensive at £148.
The standard Reolink Duo 2 PoE is £120, so I think an extra £12 for the floodlight is a bargain.
Not quite the same, but the Reolink TrackMix PoE is £157 and is perhaps better suited on larger properties if you want to be able to have a zoomed-in view of anyone approaching.
As usual for Reolink, there is not much out there that competes directly with the Duo Floodlight.
Annke, Hikvision and Dahua all have a dual lens camera, but no floodlight.
- Annke NightChroma NCD800 is £260
- HIKVISION DS-2CD2387G2P-LSU/SL is £245 (and basically the same as the Annke)
- Dahua IPC-PDW5849-A180-E2-ASTE is £294
- Dahua DH-IPC-PFW5849P-A180-E2-ASTE is £294
While these are a lot more expensive, they all have the ability to record colour footage at 0.0005 Lux. Currently, Reolink only has the CX410 which is capable of true full-colour night vision.
Looking at consumer-focused brands, I’d say the Eufy Security Floodlight Cam 2 Pro is the best alternative product. It is a PTZ camera, so it doesn’t have a permanent 180° field of view but can be set to patrol around and will auto-track objects. It lacks the 24/7 NVR recording that Reolink has, and it costs quite a bit more at £200.
Reolink Duo Floodlight PoE Surveillance Camera Review
Summary
I was a big fan of the Reolink Duo 2 as it fixed the main issue that the original Reolink Duo had, and I love the Duo concept. Having two cameras for 180° field of view makes home surveillance much easier to implement. I, therefore, love the Reolink Duo Floodlight. There is a negligible difference in cost between this and the Duo 2, but you have the improved security and colour footage that the floodlight offers. Perhaps the only downside this has compared to the Duo 2 is that it is a bit big and ugly to have multiple cameras dotted around my property.
Overall
90%-
Overall - 90%90%
Pros
- Fantastic price
- 180° FoV with dual cameras for 4608X1728
- Floodlight improves night time footage and general security
Cons
- More expensive competing options have true full-colour night vision.
I am James, a UK-based tech enthusiast and the Editor and Owner of Mighty Gadget, which I’ve proudly run since 2007. Passionate about all things technology, my expertise spans from computers and networking to mobile, wearables, and smart home devices.
As a fitness fanatic who loves running and cycling, I also have a keen interest in fitness-related technology, and I take every opportunity to cover this niche on my blog. My diverse interests allow me to bring a unique perspective to tech blogging, merging lifestyle, fitness, and the latest tech trends.
In my academic pursuits, I earned a BSc in Information Systems Design from UCLAN, before advancing my learning with a Master’s Degree in Computing. This advanced study also included Cisco CCNA accreditation, further demonstrating my commitment to understanding and staying ahead of the technology curve.
I’m proud to share that Vuelio has consistently ranked Mighty Gadget as one of the top technology blogs in the UK. With my dedication to technology and drive to share my insights, I aim to continue providing my readers with engaging and informative content.

