Any links to online stores should be assumed to be affiliates. The company or PR agency provides all or most review samples. They have no control over my content, and I provide my honest opinion.
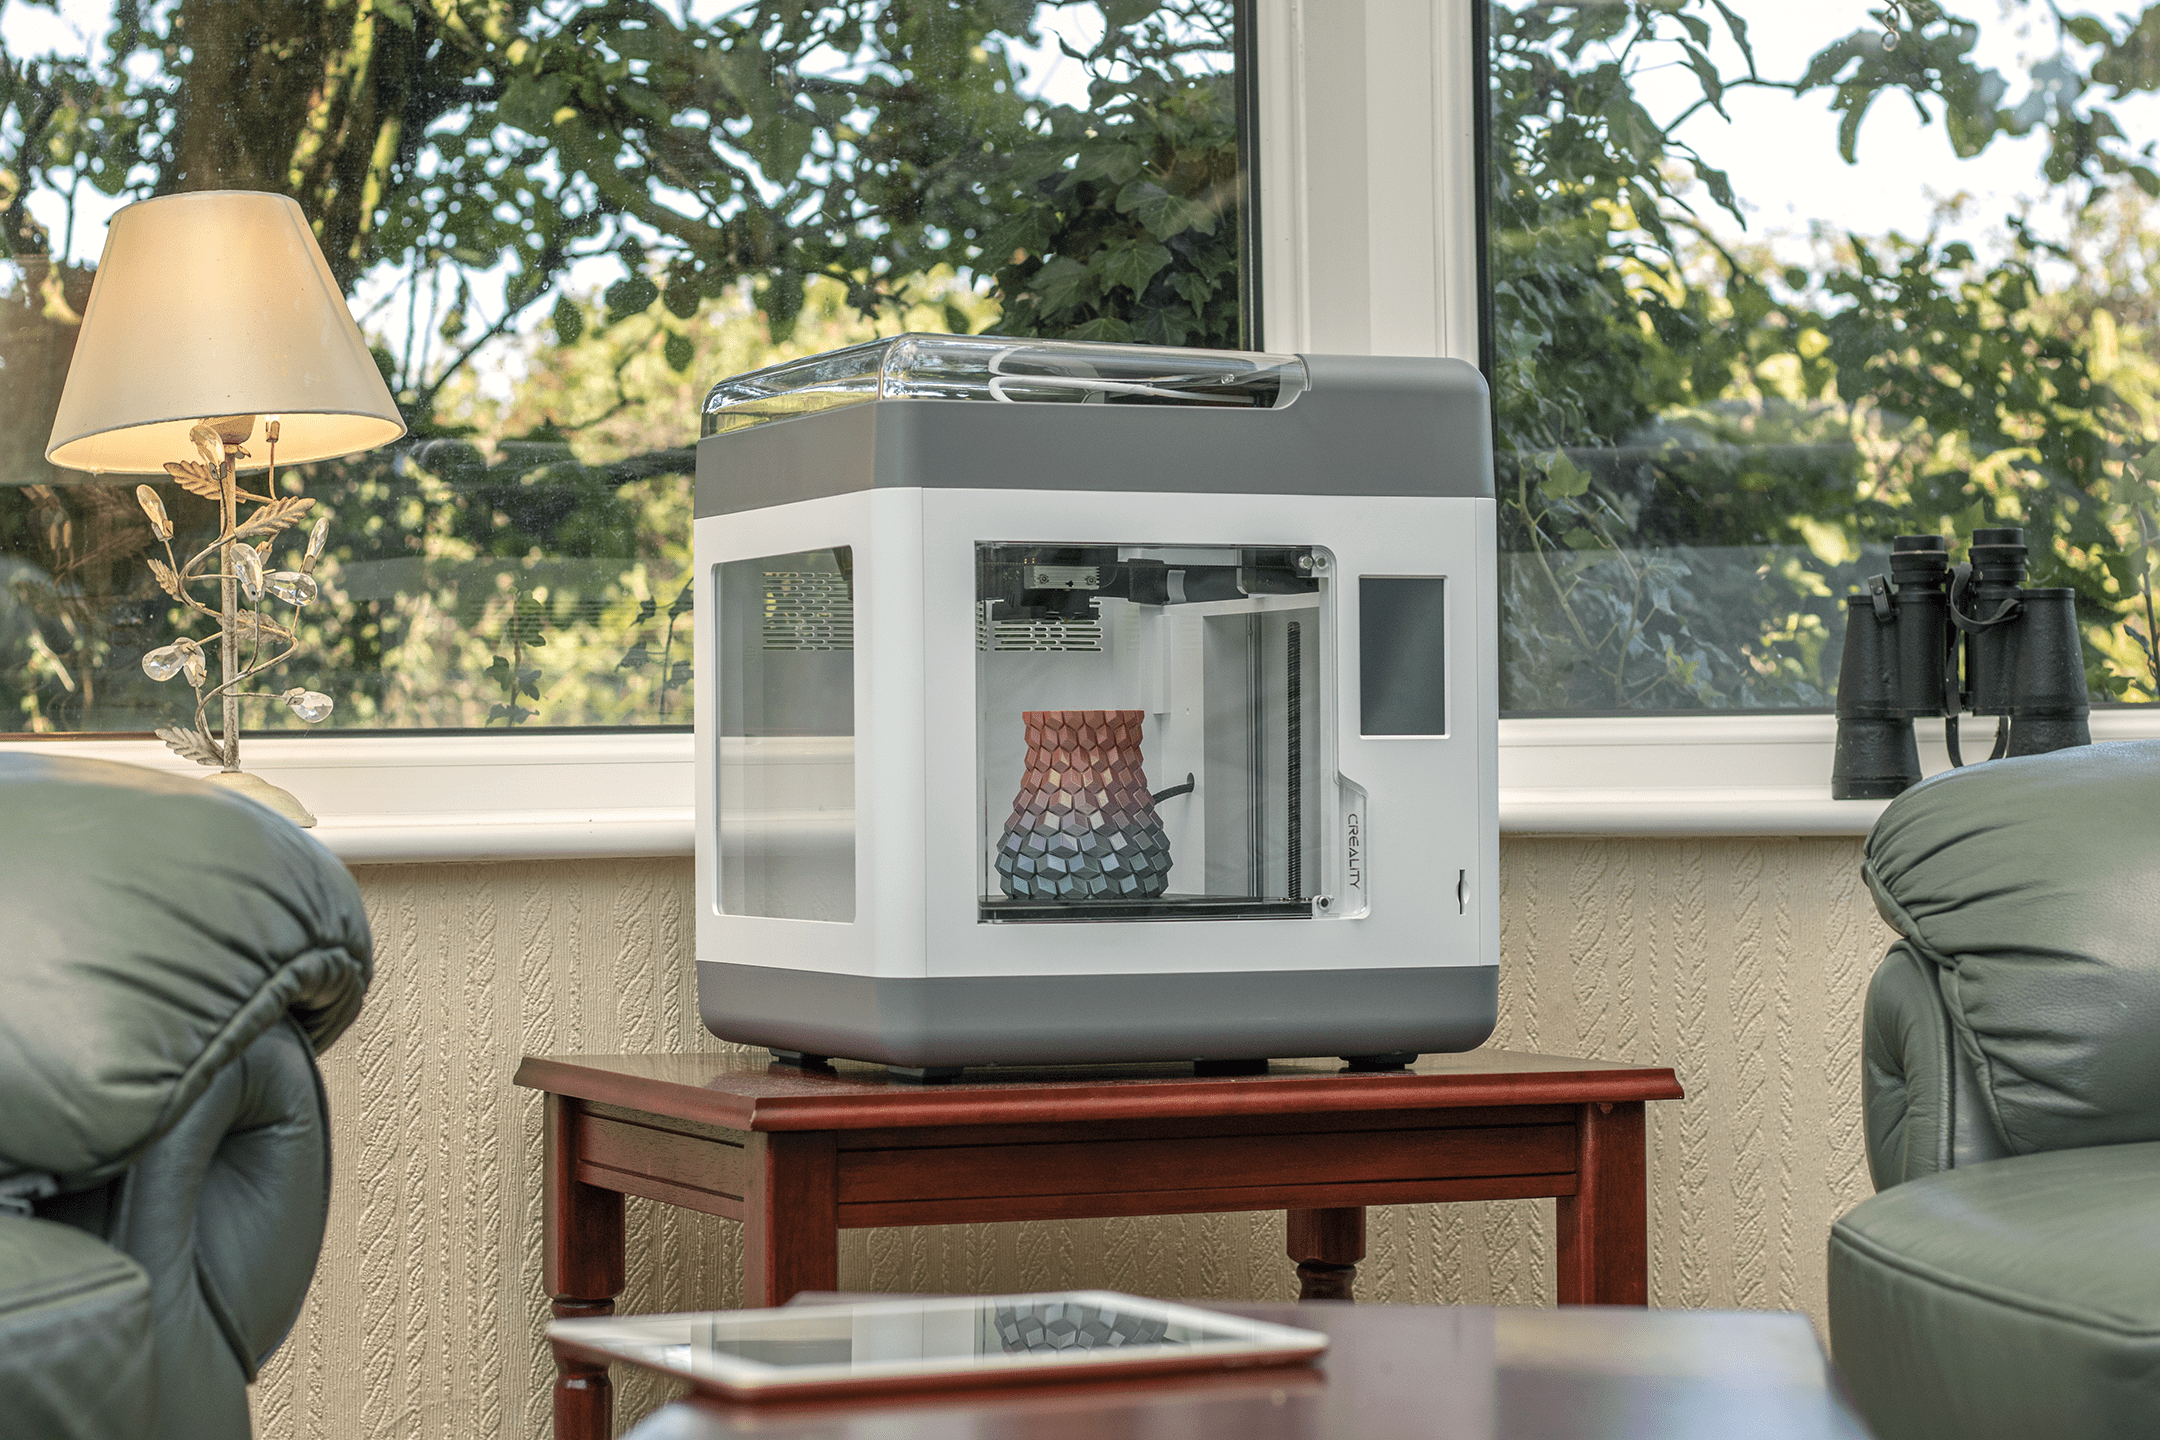
The Creality Sermoon V1 Pro is perfect for beginners as this device requires no assembly or levelling. Simply unpack, load your filament, and then you’re all set to go. Because of the all-in-one design, the Sermoon fits nicely into a home environment; this is especially clear when you realise how quiet the printer is. While printing, the Sermoon V1 Pro only produces about 45dB, about the same volume as a refrigerator.
Creality Sermoon V1 Pro Specs
| Print Technology | FDM |
| Max. Build Dimensions | 175 x 175 x165 mm |
| Machine Dimensions | 400 x 380 x 430 mm |
| Package Dimensions | 485 x 465 x 526 mm |
| Machine Weight | 11.5 kg |
| Package Gross Weight | 15 kg |
| Extruder | Sprite Direct Drive |
| Max. Nozzle Temperature | ≤250℃ |
| Max. Heated Bed Temperature | ≤8O° |
| Print Precision | ±0.1 mm |
| Layer Thickness | 0.1-0.4mm |
| Power Supply | 100-120Vac 200-240Vac 50/60HZ |
| Nozzle Diameter | Standard 0.4mm |
| Nozzle Quantity | 1 |
| Supported Filament | PLA / ABS / PETG |
| Filaments Diameter | 1.75mm |
| User Interface | 4.3″ Colorful Touch Screen |
| Rated Power | 150W |
| Resume Print | Yes |
| Filament Detection | Yes |
| Print Interface | Wi-Fi / SD Card |
All-in-one
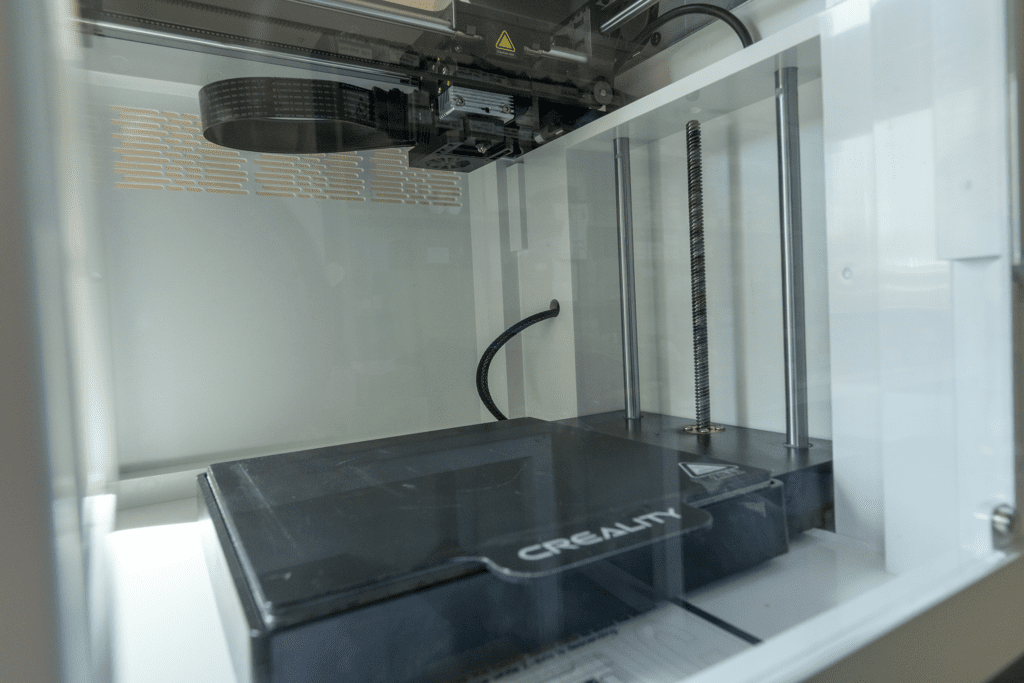
This all-in-one enclosure also allows for better control of the printing environment, as different materials rely on different temperatures/ cooling rates. Per the instructions, the user should remove the printer’s lid when using PLA filament if the printing area temperature exceeds 30°C. However, unfortunately, there is no internal air thermometer or means to gauge this from the printer itself; it seems like an odd thing to specify without giving the means to do it. The design allows for a cleaner overall aesthetic and a safer working environment, significantly reducing the chance of wires tangling or being trapped.
The Pro Features
The difference between the Sermoon V1 and the Sermoon V1 Pro are two additions, a wifi-enabled camera and an open door sensor. Upon comparing the two machines, these two features cost an additional $120, which represents a 28% increase in the price. That is significant, and I think I would struggle to justify that cost if I were buying this myself.
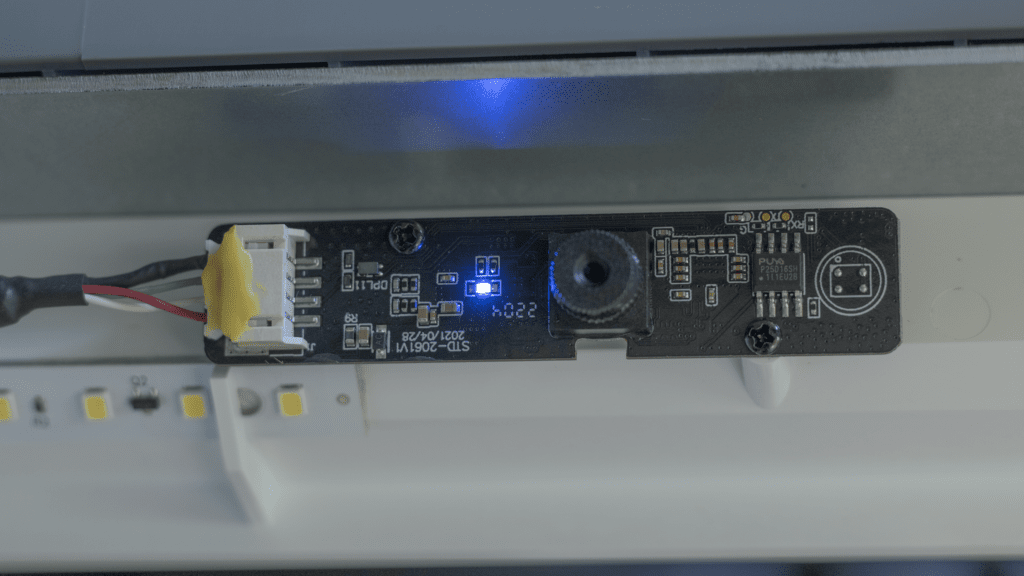
I admit the camera is a brilliant feature and works effortlessly with the Creality Cloud App. Users can log in to the app and live stream this feed from the wifi-enabled camera to anywhere in the world, additionally assisted by the automatic LED light strip. Furthermore, the camera allows for the automatic creation of time-lapses of your successful prints in 6s clips; these are also accessible on your Creality Cloud account.
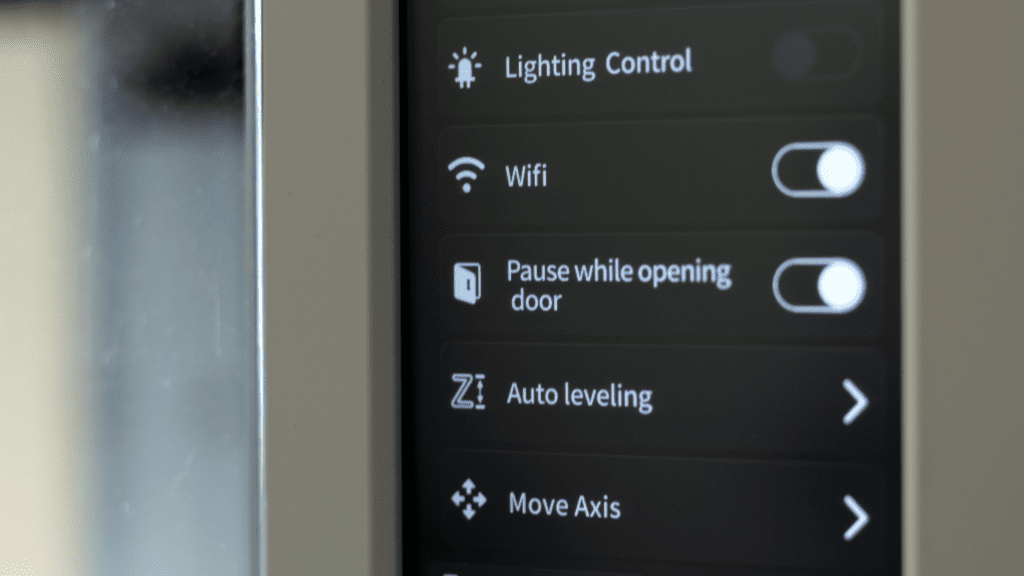
I don’t personally find the open door sensor quite as valuable and borderline gimmicky. In principle, it seems like a nice quality of life feature; however, in practice, it doesn’t cut the cheese.
With the setting enabled, and upon opening the door, the Sermoon V1 Pro will pause the print. A function conducted similarly to that of a filament break sensor. This door sensor is advertised as a safety precaution, reducing the chance of injury by pausing.
However, “pausing” doesn’t stop the printer immediately; instead, it completes the current process, moves the printhead away, and initiates cooling. As I’m sure you’re pretty aware, hot things don’t cool down instantly, so an adequately motivated being could still be injured by a “paused” printer which could still be moving and still be at about 200°C.
The pause feature is not a suitable alternative to proper safety precautions. 3D printers should be operated in a safe, controlled environment.
In addition, when using the printer with the open door feature active, I found it interfering and unnecessary. For example, quite often, with an FDM printer, the user will need to remove some dribbles or blobs from the nozzle when starting a print. But pausing the print upon opening the door causes as many problems as it solves, so I just deactivated the feature in the end.
Auto levelling
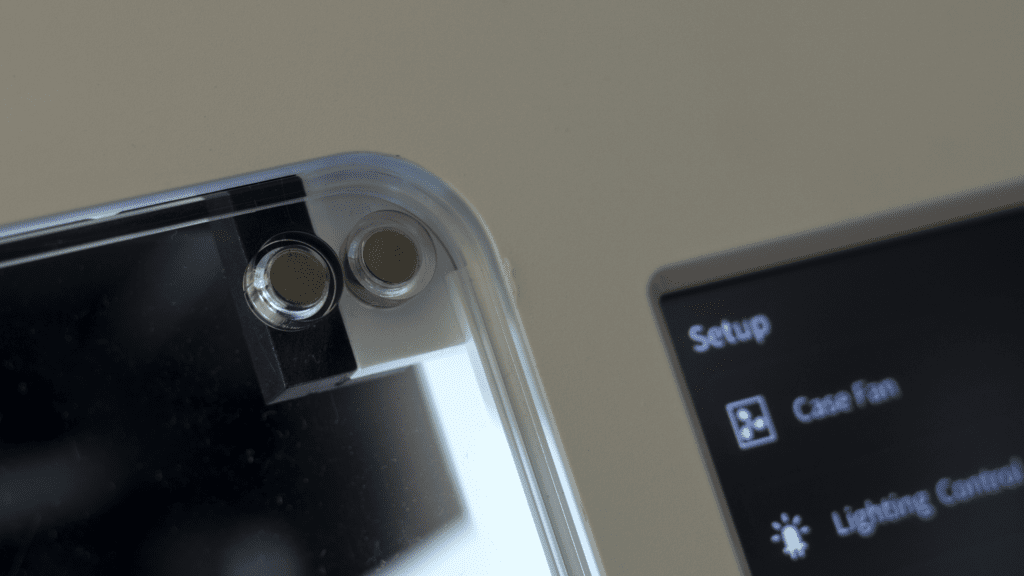
Levelling a bed is an essential part of 3D printing, and I haven’t reviewed two printers which use the same method yet. The Sermoon V1 Pro uses an odd digitalised manual system, and I don’t think it quite counts as “auto levelling”.
The user uses the levelling paper as a gauge and adjusts the z-axis until the hot end grips the paper; this process is repeated five times across the print surface. To change the z-axis offset, the user must use the on-screen controls, moving the height in increments of 0.05mm. I found this process incredibly tedious as each of the 5 points were between 2.5-3mm away from the nozzle; this means the user has to stand there and patiently tap the up arrow as the bed creeps toward the print head. The limited access via the door also hinders this process as the user has to reach into the depths of the machine to pull on a piece of paper delicately.
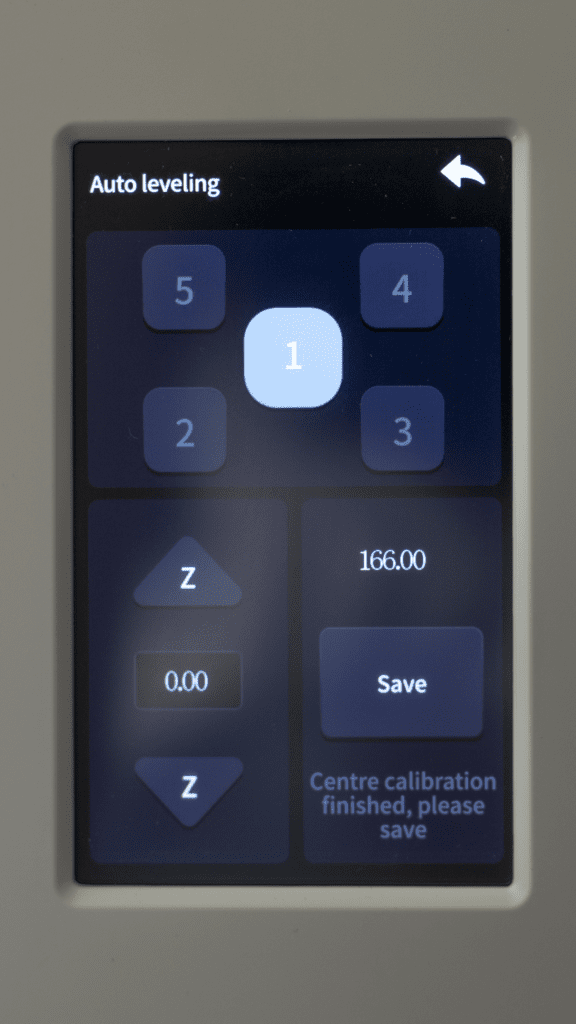
For anyone attempting to level any printer, I recommend preheating and waiting approximately 5 minutes before completing the levelling process. This allows the printer to expand with the heat and settle, reducing potential inconsistencies in your initial print layers.
Wifi Connectivity
Creality Cloud is their new all-in-one service which allows you to get models, slice, and start prints all online. All wifi-enabled printers from Creality can use this service, and once you get your head around the website/ app, it’s relatively simple to use.
Available on the website is a growing collection of free-to-use models which can be downloaded or sliced on the app or in a browser. You can also upload slices directly from your computer to your 2gbs free storage.
I have mixed feelings about this service as I fear it is trying to do too much. Users can download any models they acquire from this service and slice them locally, using their slicer of choice. Afterwards, you can upload these slices directly to your Creality Cloud account, allowing you to download and start a print on your wifi-enabled Creality printer. This part is excellent and my most used feature. I have all my presets already saved on my Creality Slicer, and upon logging in, I can upload slices directly to my CC account from the slicer.
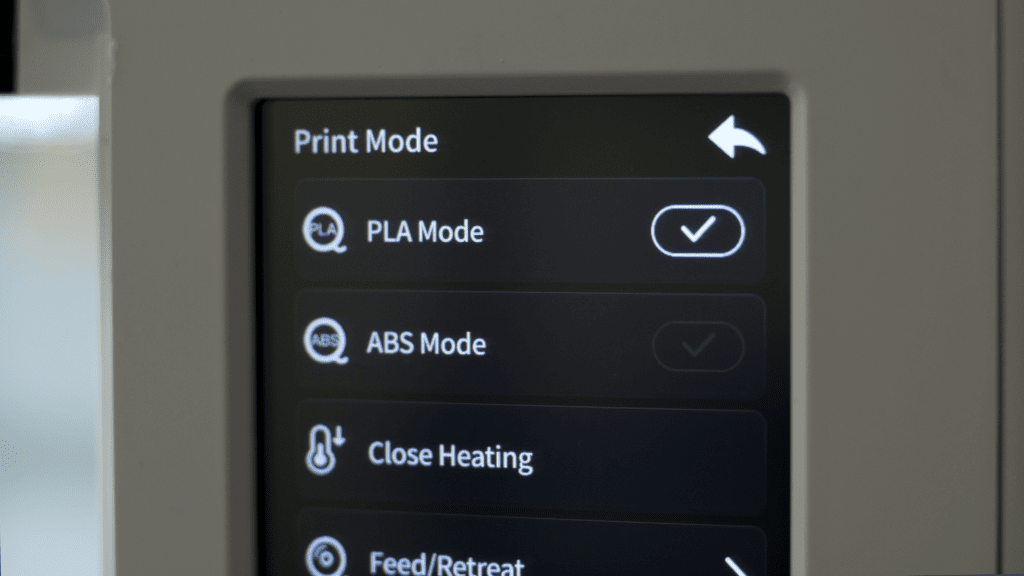
Interestingly though, for some unknown reason, my printer would not appear online in the browser version of CC, only in the mobile app. There I could start, pause, and monitor the prints from the Sermoon. It is worth noting you cannot use cloud printing if you have manually activated the PLA or ABS settings on the printer. I don’t know why this is a hindrance; I just saw it on the user guide.
Another feature of the Creality Cloud service is the Cloud Slicing. Personally, I didn’t enjoy using this feature. The default settings were comical – retraction was turned off, and supports were set to ‘everywhere’ – overall, it was awkward and finicky. Also, akin to the previous connection problem, I was unable to use the slicing feature on the mobile app; it was only possible on the desktop browser. I will admit, I do not know if this was a user error, but from what I did experience from these features, I don’t feel like I’m missing out.
Sprite Direct Drive System
At the heart of the Sermoon V1 Pro is Creality’s new direct double drive extruder. Direct extrusion allows for smaller, quieter motors than that of a Bowden design, and this helps the Sermoon remain incredibly quiet. The proximity of the extruder also allows for more force to be applied to the filament, increasing retraction and feeding accuracy. However, direct extruders add extra weight to the printhead, limiting the overall print speed. Despite this, the Genie extruder still performed well, especially as it’s lighter than comparable direct extruders, as it only weighs 210g.
Spring Steel Print Surface
One of my favourite mod cons of 3D printers nowadays is the addition of magnetic spring steel print beds. This material allows for easy removal of prints from the bed and the bed itself from the printer. I value this addition as it reduces the chance significantly of knocking the z-axis (affecting the level) when wrestling with a well-adhered print. Though, I will also add that a removable print bed is essential to make a fully enclosed printer viable.
Recommended Settings
Unfortunately, there isn’t a settings profile included with the printer. Additionally, no recommended settings are available upon adding the Sermoon V1 Pro to Creality Slicer; the only settings imported are the print area size.
However, blessed upon me with the review sample Creality kindly sent are some recommended settings which I shall share with you. I believe receiving a setting profile with a printer should be standard, especially as the default settings from Creality Slicer/ Cura are a bit naff.
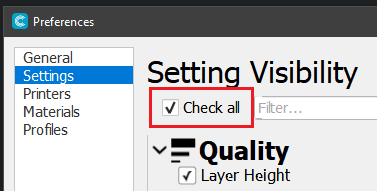
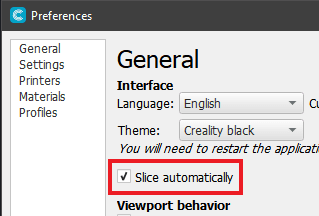
For potentially new users of Creality Slice/ Cura, I recommend selecting this option to ‘Check All’ settings; this allows you to view all options in the advanced print settings menu. Additionally, I like having ‘Slice Automatically’ enabled, though this could cause some lag on slower machines or larger, more complex prints.
1. Quality / Layer Height
With the settings supplied, there wasn’t any layer setting specification given. However, I found the best results using the default 0.2mm option.
2. Shell
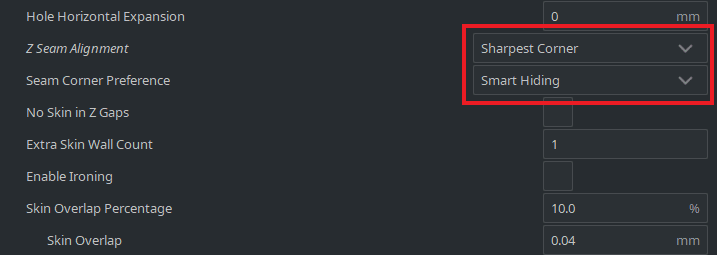
Creality suggests using the ‘Sharpest Corner’ option for non-cylindrical prints and the ‘User Specified’ options otherwise.

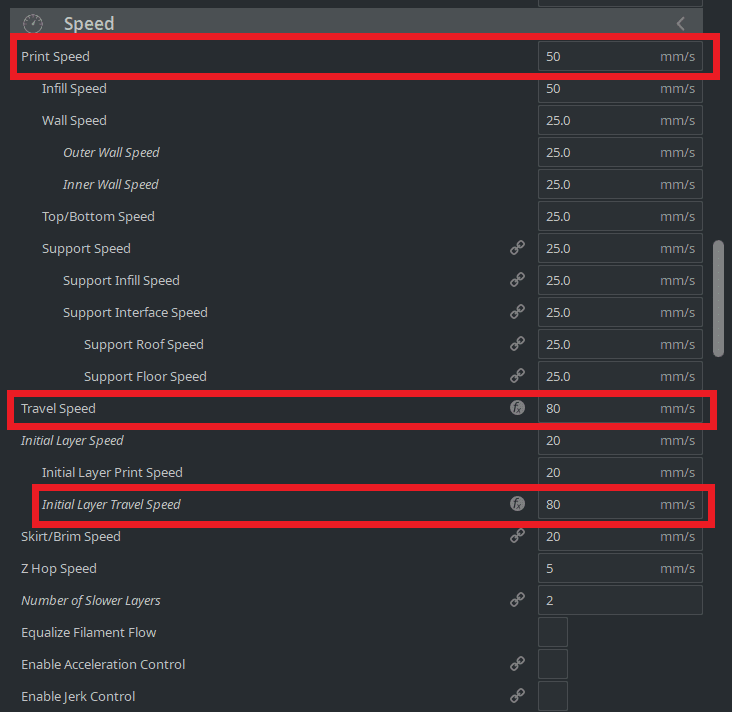
3. Speed
Highlighted are the most important options to consider.
4. Travel
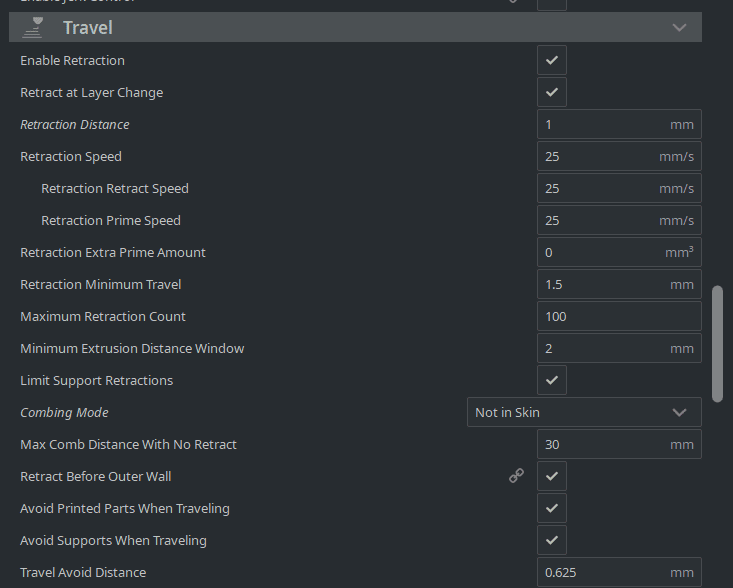
I found these settings to create decent prints from the Sermoon V1 Pro. However, I would recommend exploring different settings when printing at a layer height of 0.1mm since I experienced too much filament extruded, causing adhesion and layer height issues.
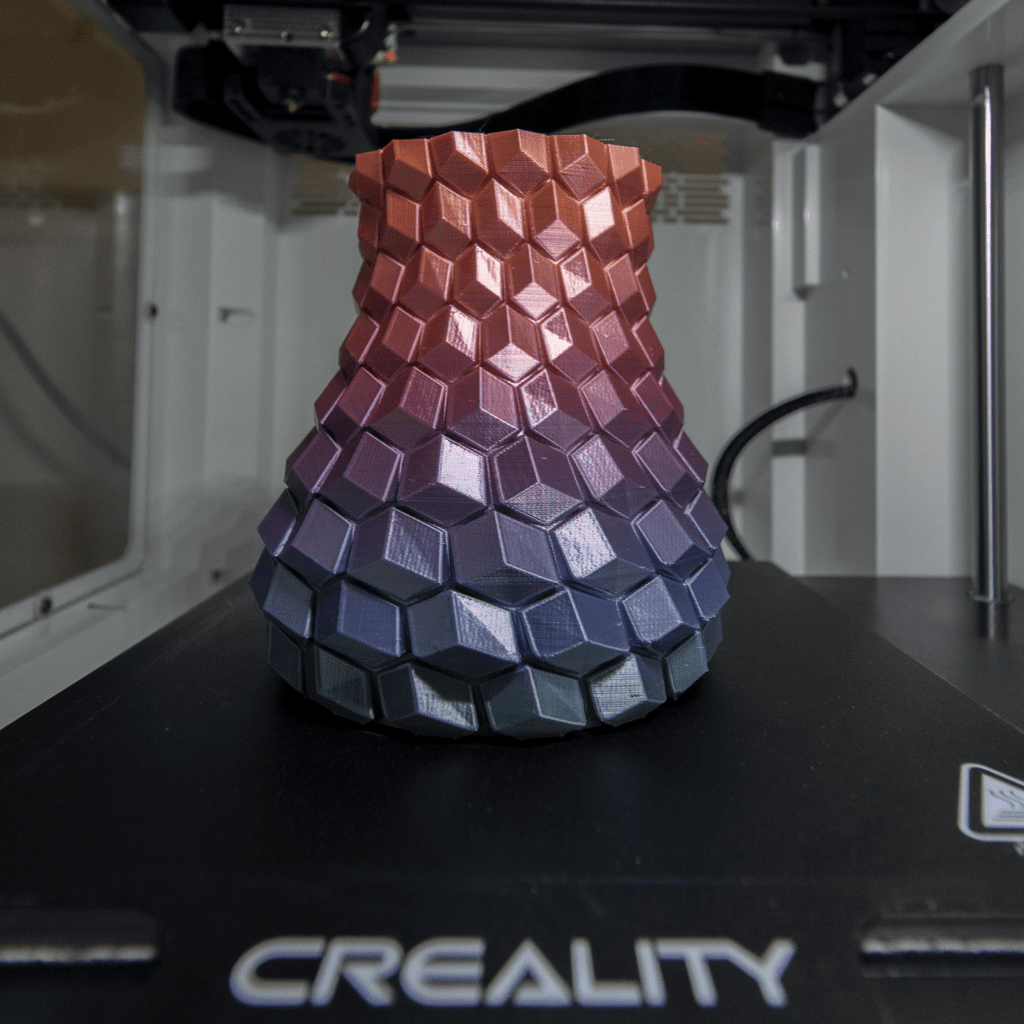
Print Sample
Conclusion
The Sermoon V1 Pro is mostly a good printer; it’s elegant, simple, and quiet. It’s relatively easy to use, no set-up required and can produce some excellent prints. This makes it perfect for beginners or someone interested but is too busy to learn about the complexities of these machines.
Creality Sermoon V1 Pro 3D Printer Review Rating
Summary
The Sermoon V1 Pro is mostly a good printer; it’s elegant, simple, and quiet. It’s relatively easy to use, no set-up required and can produce some excellent prints. This makes it perfect for beginners or someone interested but is too busy to learn about the complexities of these machines.
Overall
80%-
Overall - 80%80%
Pros
- No set up required
- Can produce excellent prints
Cons
- Pro features are probably not worth the 28% difference in price
I’m Ted Culshaw, a dedicated professional adept in the realm of film, photography, and 3D design. As the brother of the chief editor at Mighty Gadgets, James, I’ve had the privilege of overseeing the reviews for a wide range of 3D printers and creative products, covering everything from photography to lighting. My academic background in film and photography, coupled with a brief stint in the TV industry, has provided me with a rich foundation in these fields, which I leverage to consistently deliver high-quality reviews.
In my current role at my father’s bespoke kitchen business, Culshaw Kitchen Makers, I am responsible for creating many of the 3D designs and CNC cutting, thereby directly contributing to the beauty and functionality of our handmade kitchens. I take immense pride in my work, and I am constantly seeking ways to improve and innovate.
Aside from this, my passion for photography and filmography extends beyond my professional life. I regularly offer freelance services to local businesses, using my skills to help them elevate their visual presence and narrate their unique stories.
At heart, I am a passionate professional who believes in the transformative power of creative design and visual storytelling. Whether it’s through reviewing the latest 3D printer or crafting a bespoke kitchen design, I am committed to delivering excellence in all my endeavours.
You can find me on Instagram

