Any links to online stores should be assumed to be affiliates. The company or PR agency provides all or most review samples. They have no control over my content, and I provide my honest opinion.
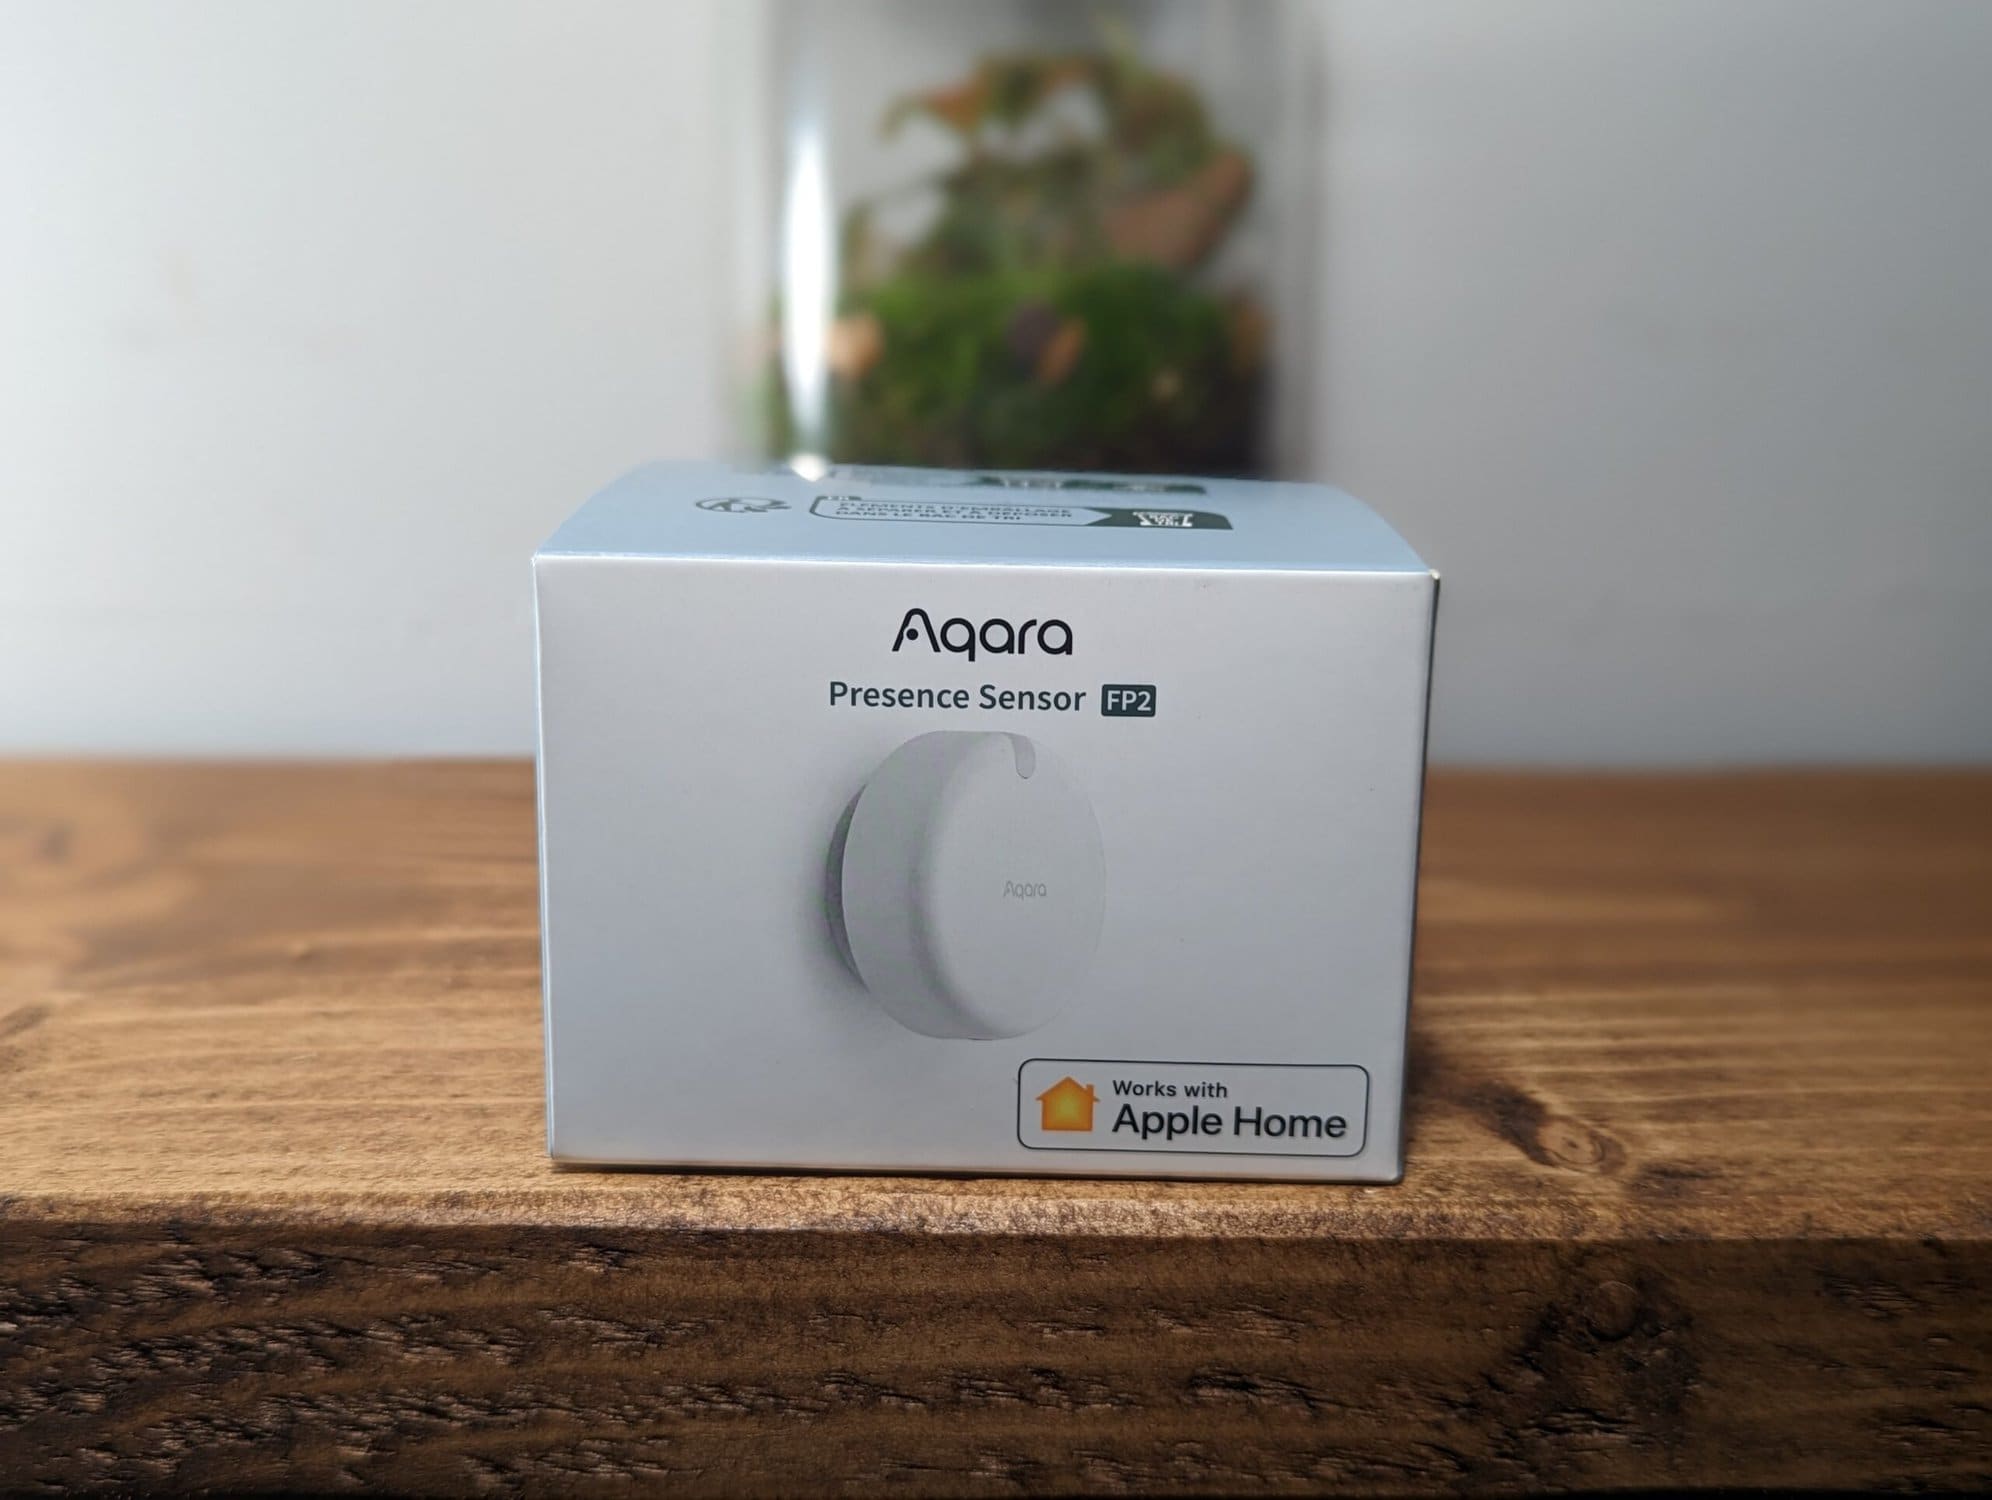
The Aqara Presence Sensor FP2 was launched globally a couple of weeks ago. It replaces the FP1 which launched last year, this wasn’t launched globally, but many people imported it from China due to its unique feature set.
| Preview | Product | Rating | Price | |
|---|---|---|---|---|

| Aqara Presence Sensor FP2, mmWave Radar Wired Motion Sensor,... |
£82.99 | Buy on Amazon |
Millimeter-wave vs PIR Sensors
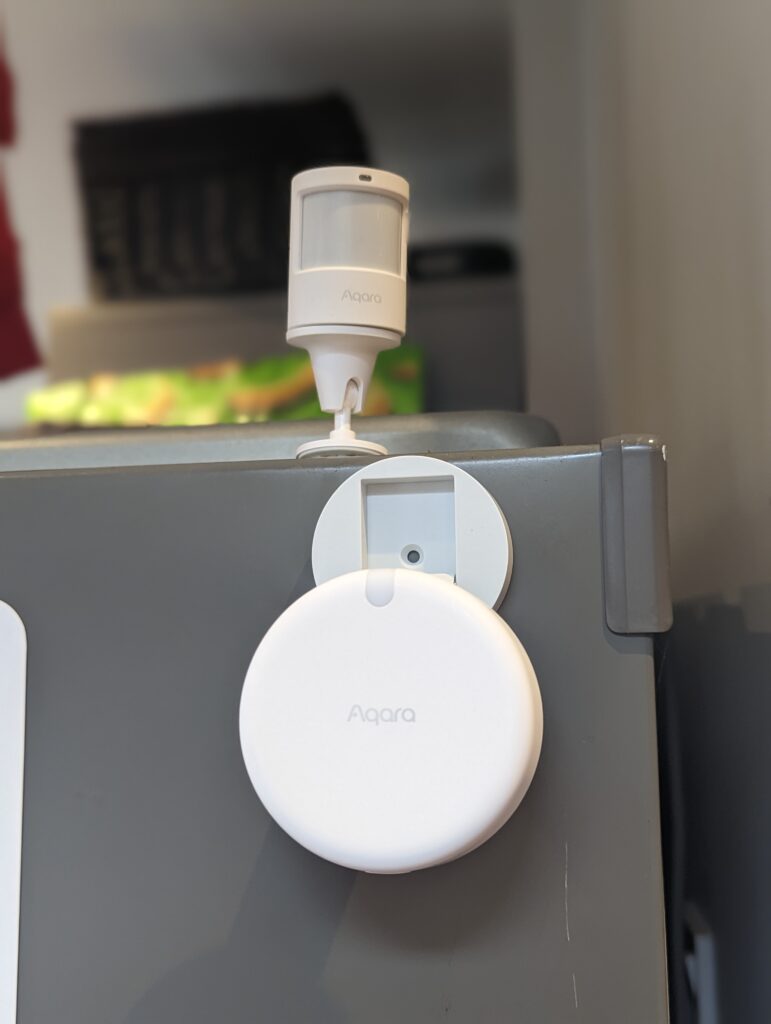
The FP2 uses a 60GHz mmWave radar as the sensor in comparison to the infrared sensor you find on normal motion sensors. The main advantages of this are:
- Incredibly accurate. The mmWave radar can detect any motion in a room and can therefore detect when someone is in a room but not moving. An IR sensor will often fail to detect movement if you are sitting down, which can consequently cause no motion automation triggers.
- The FP2 can break down a room into 320 cells and allow you to have 30 zones allowing you to trigger unique actions for each zone.
- The FP2 can detect up to 5 people simultaneously.
- The FP2 should respond instantaneously
Aqara Presence Sensor FP2 Features
- Zone Positioning: It offers significant advantages over traditional PIR infrared motion sensors by using a single radar sensor to monitor rooms up to ca. 430 sq ft (ca. 40 m2). Furthermore, you can divide it into up to 30 zones, such as sofa, bed, or desktop. Additionally, you can set up individual automation for each zone. It is as if you were using several PIR motion sensors simultaneously with one Presence Sensor, FP2.
- Multi-person Detection: Up to 5 target people can be detected simultaneously. The result is that, while dividing the space, it can also respond automatically according to the position of different people without interfering with each other.
- Ultra-High Precision: Privacy and detection accuracy are taken into consideration. It is capable of recognising non-inductive signal detection without collecting real images. Automation, in general, can be achieved locally. Millimeter-wave radar technology is more stable than infrared sensor detection, even when you’re sitting or sleeping.
- Control Other Devices via HomeKit: The FP2 is exposed as multiple sensors in HomeKit (and Home Assistant), Alexa and Google Home. You can integrate the sensor easily without requiring a hub, which is apparently the best solution for smart home enthusiasts to expand your smart home setup.
- Fall Detection and Alerts: When someone in a room falls, the FP2 can detect and notify you. It is made in the most private and convenient way possible, without the need to wear any devices or install a camera for constant monitoring. The range is a circle with a radius of 2 meters, and the accuracy of fall detection is >98%. The recommended installation height is 2.5 m-2.8 m.
- Built-in Light Sensor: Fully functional light detection sensor in the Aqara ecosystem. With it, lighting automation becomes much more flexible and enjoyable. The built-in light sensor also allows for advanced darkness-based home automation.
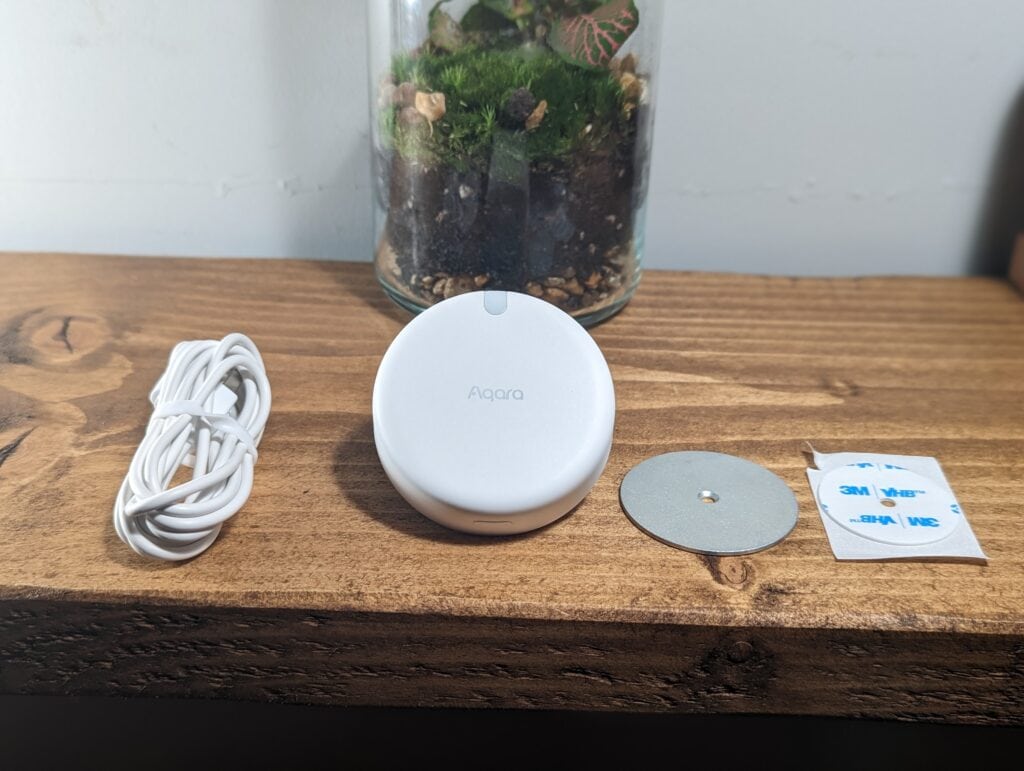
- Local Automation & Flexible Installation Ways: After the setup is complete, the product runs locally. FP2’s automation will still run as originally set if there is occasional WiFi network instability. And it better protects your privacy. It has several installation methods to adapt to various installation scenarios.
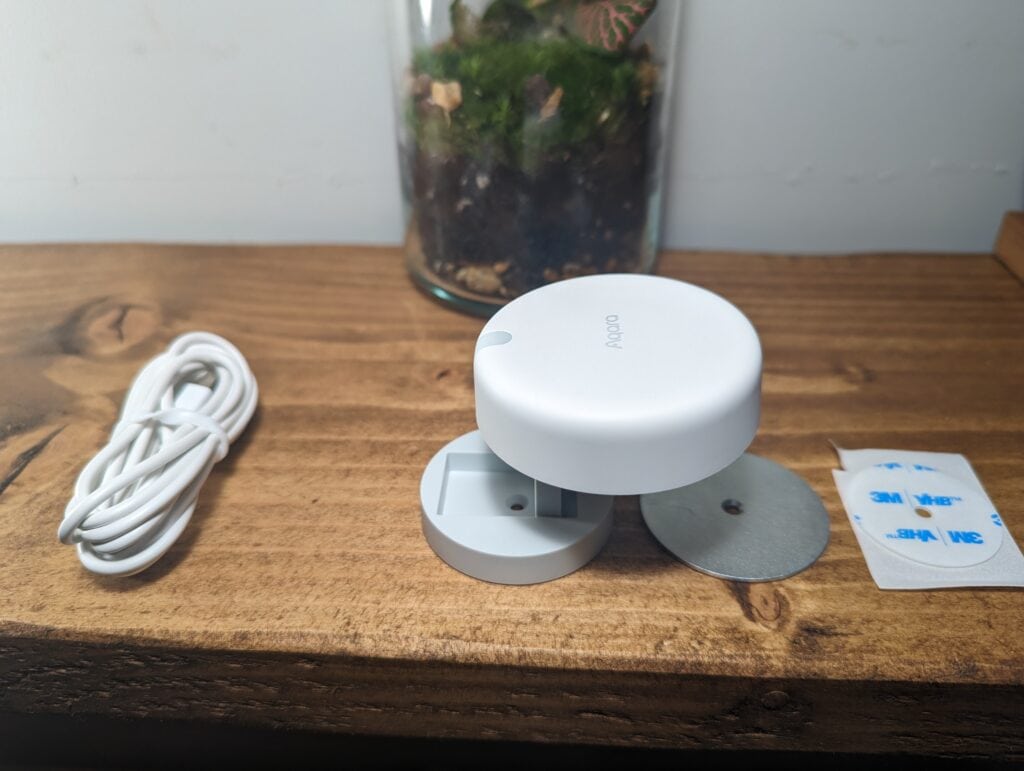
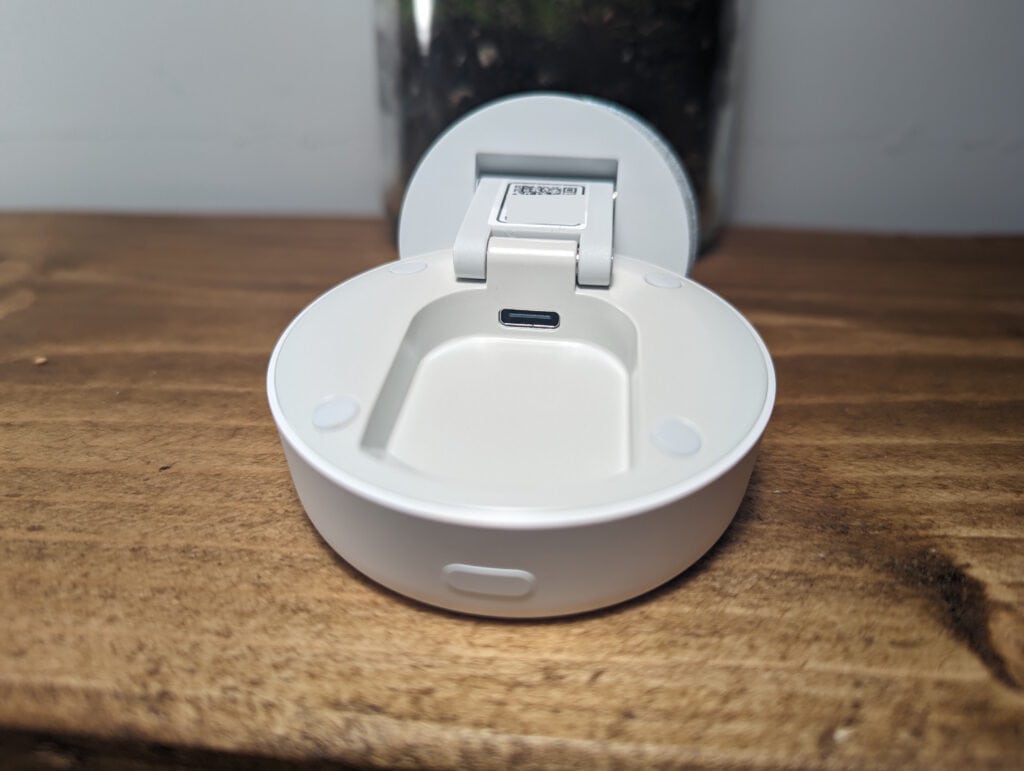
- IPX5 and Hidden USB-C Port: Because of its IP rating, the sensor can also be installed in wet environments such as bathrooms. The sensor has an open USB-C port, which allows you to swap the included cable to any USB-C compatible one, increasing the placement flexibility.
mmWave Human Presence Sensor Comparison
While I knew the FP1 existed, I wasn’t that familiar with the product as it didn’t receive a global launch. I also wasn’t aware that there were a couple of other mmWave sensors from Tuya. This is a technology that will likely become more common in smart home tech over the next few years.
Setup
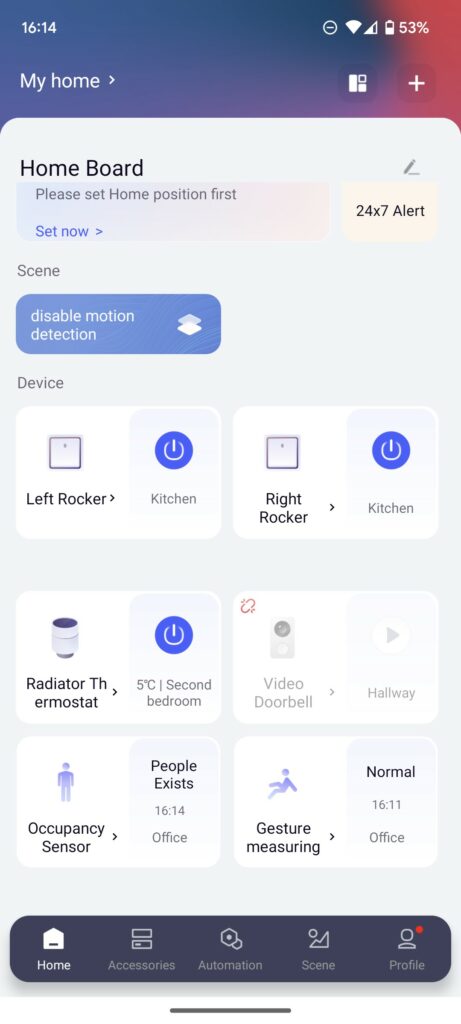
Normally when it comes to setting up smart home tech, such as sensors, there is not much to write about. This product is quite different, and the setup process is quite involved and will require some trial and error to get everything to work the way you want it to.
This is probably the main downside of this sensor, I think some people will not be willing to spend so much time tweaking things to get it to work the way they want. But, this is the price you pay if you want something so sensitive.
Detection Modes
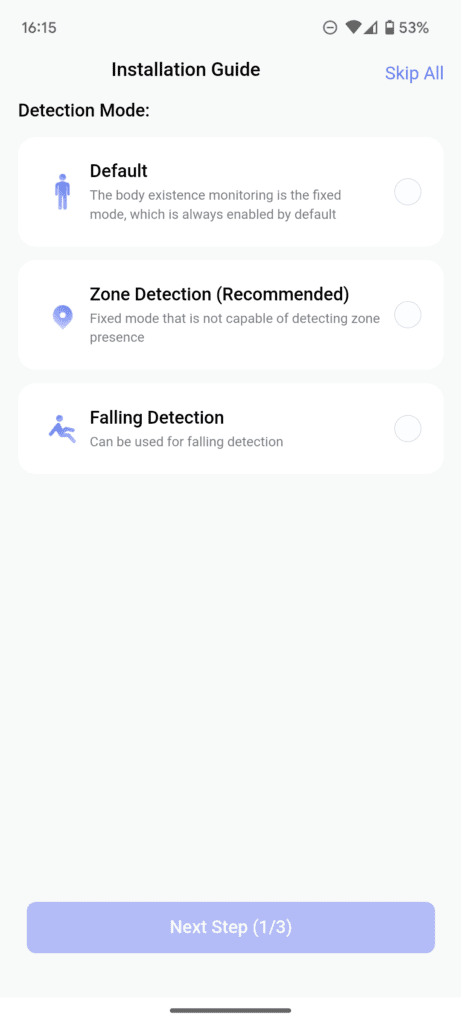
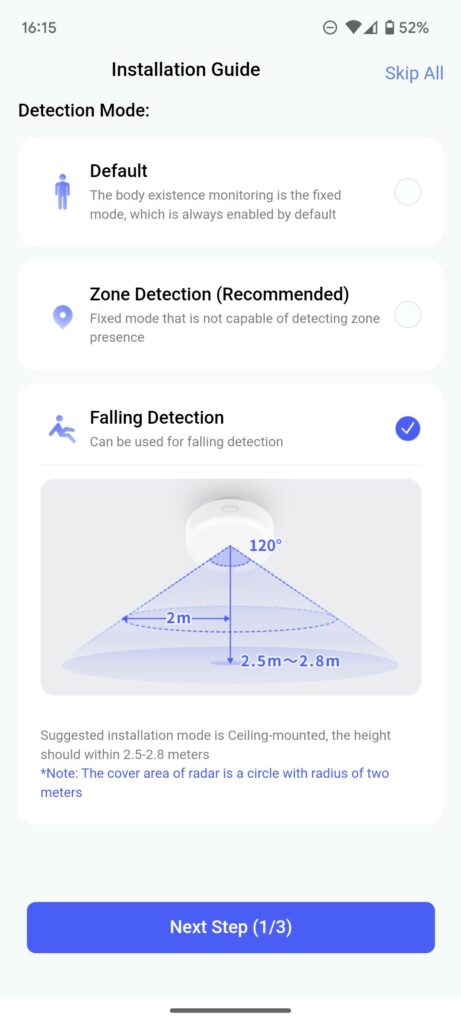
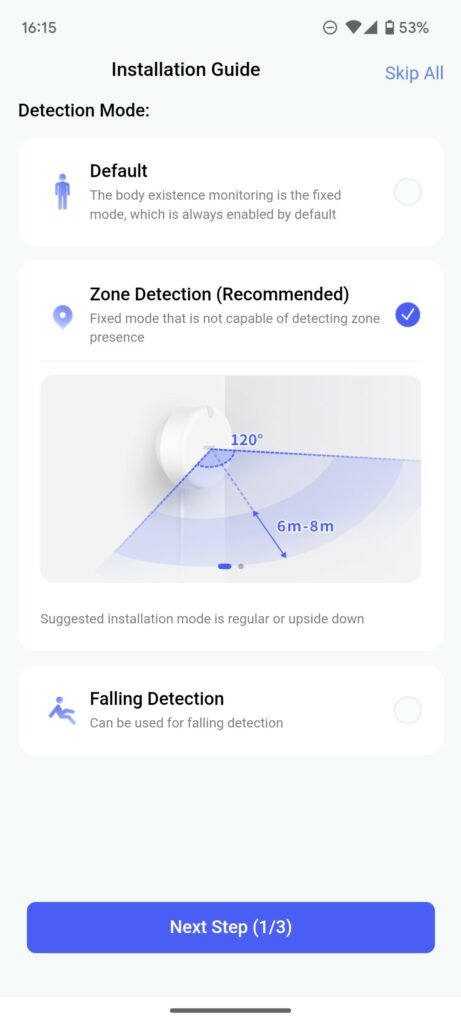
There are three modes you can use this sensor in
- Only enable body existence monitoring
- Personnel positioning
- Provides real-time location data and proximity sensing functions
- The suggested installation location is on a vertical surface (wall).
- Falling detection
- Used for detecting people falling
- The suggested installation location is top-down on a ceiling, and this covers a circular area with a radius of two meters
While fall detection looks incredibly useful for some scenarios, I would assume most people will use the personnel positioning option.
Mapping your room and setting up zones
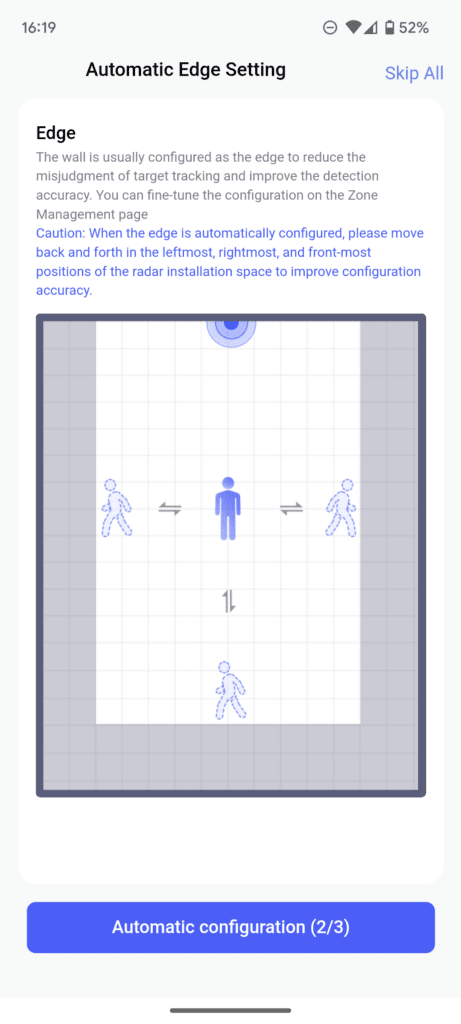
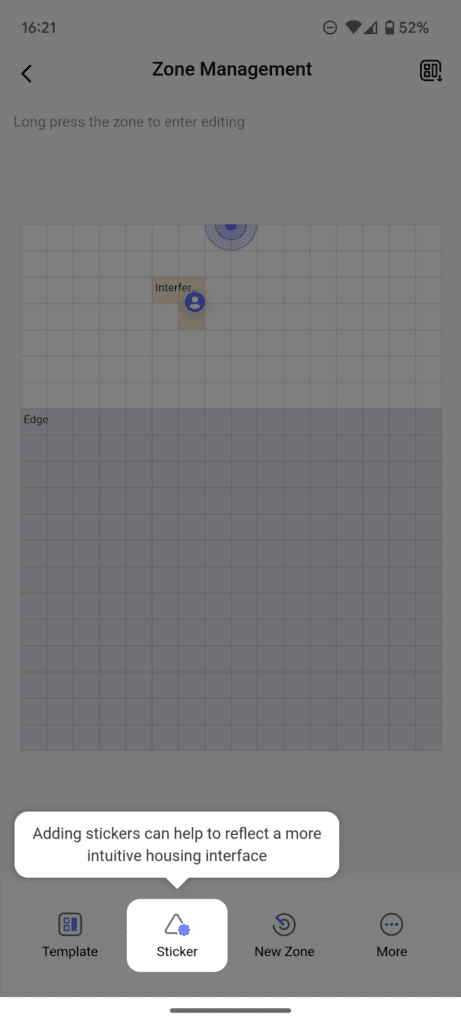
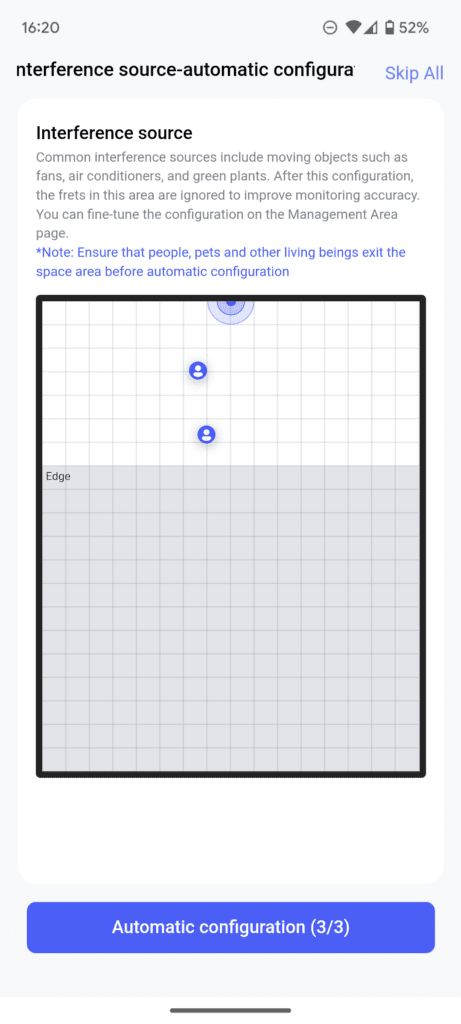
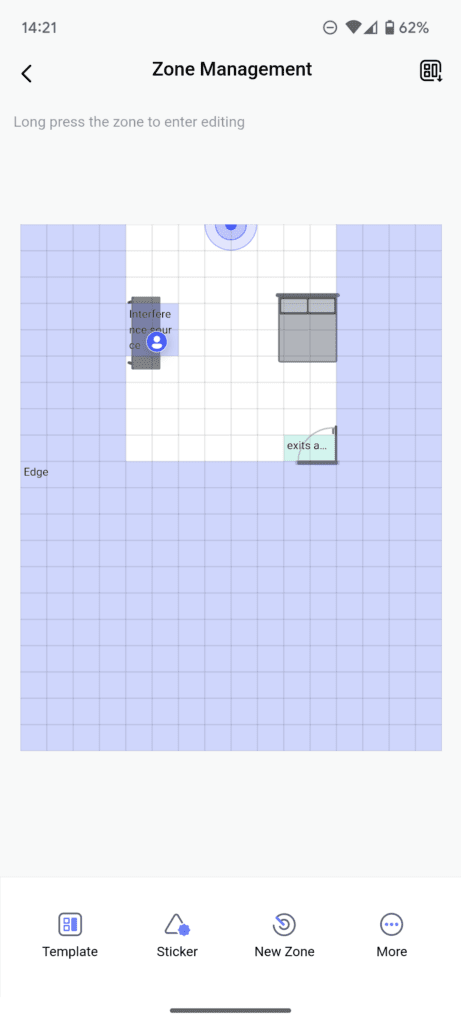
You need to create a map of your room so that the sensor can create the individual zones. The basics are quite simple, but I found that it took some trial and error to get it working.
Edge
The first part of the room setup is to define the room size and its edges. The automatic process asks you to move around between all the edges of the room for improved detection accuracy.
When this is complete, you can manually adjust it. It didn’t look right to me at first, so I walked around the room and adjusted the zone based on where my little dot presence dot was.
Interference Zone
With the sensor being very sensitive, you will need to run a test to identify possible causes of interference. One example would be if you have a fan running the room.
With this test, you need to exit the room, and it will detect whatever is causing interference. For me, it looks like it detected my desktop PC, or possibly the speaker that sits on top of it. I assume the fans in my PC triggered it, which shows you how sensitive it can be.
Detection Zone
The detection zones are as you’d expect. This allows you to segment your room into zones, and you can trigger actions based on events within each zone.
Exit and Entrance
You can then define where the entrance and exit is.
It is also possible to use stickers, so you can visualise your room properly. I didn’t put too much effort in here, I just defined my office table and a bed that’s in the room, which helped me visualise where I wanted my detection zones.
Third-Party Zigbee Hubs – Homey Bridge
With Aqara being based on Zigbee, many people like to use the sensors with different hubs. Homey is about the best option for the wide range of devices it supports.
Homey supports a lot of the Aqara sensors, but it does not support the FP2, they don’t even support the FP1.
Performance / Automation
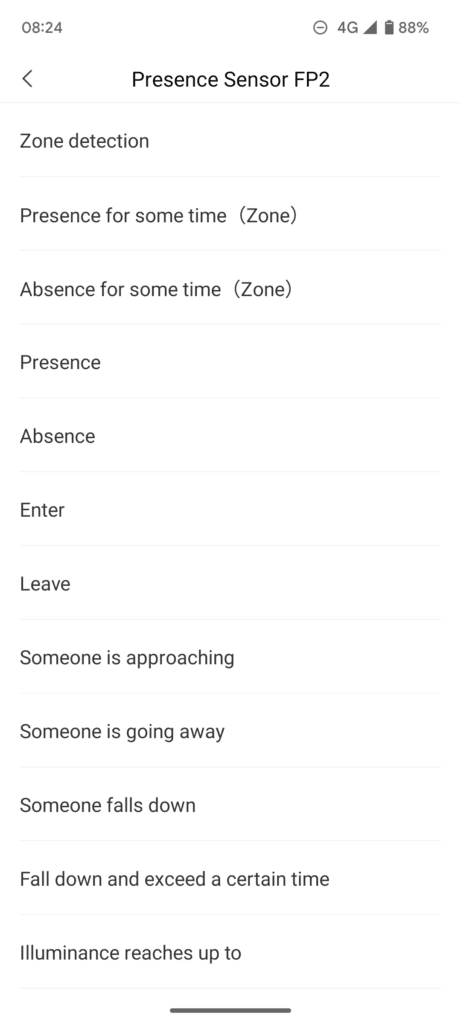
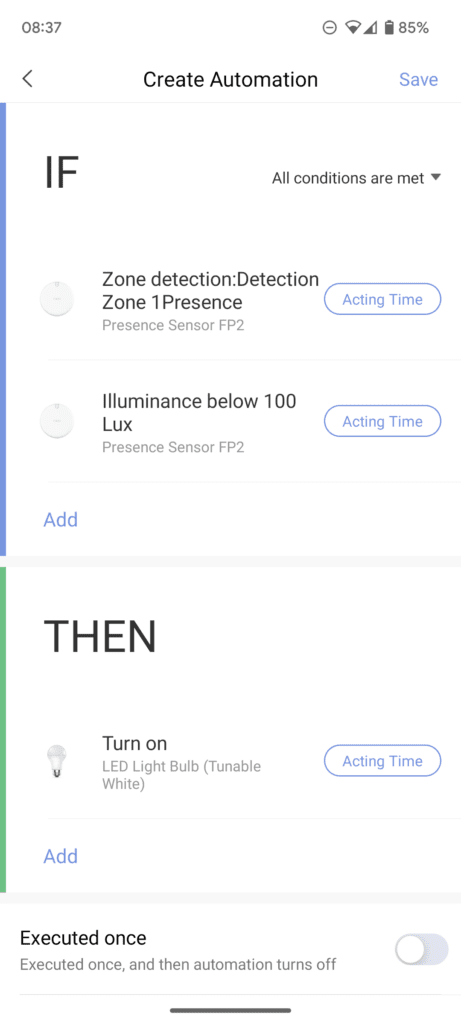
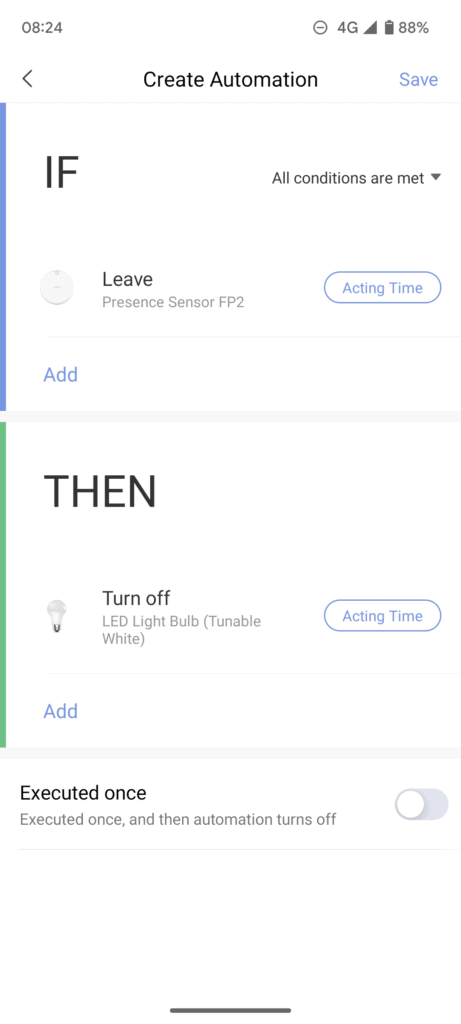
I set this up in my office as it is likely the best room for the specific features. I spend most of my day sitting at my desk working, so a PIR sensor isn’t much use because it wouldn’t be sensitive enough to detect my presence.
I kept things quite simple, mainly because I don’t have much need for anything too fancy.
I used the sensor to control the ceiling light in my room, which is one of the Aqara Tunable LED bulbs.
I set up relatively basic automation. When I am sitting at my desk, the light switches on. When I enter the detection zone near my door, the light switches off.
The triggers you have are more extensive than a normal PIR sensor. You get:
- Presence/Absence (with some time options)
- Enter/Leave
- Someone Approaching/Going Away
- Someone falls down / Fall down and exceeds a certain time
- Illuminance triggers
It is quite useful as I have a tendency to leave my lights on all day even though I am in and out of the office a lot.
With my room set up properly, this basic automation worked perfectly and was near instantaneous.
Price and Alternative Options
| Preview | Product | Rating | Price | |
|---|---|---|---|---|

| Aqara Presence Sensor FP2, mmWave Radar Wired Motion Sensor,... |
£82.99 | Buy on Amazon |
The Aqara Presence Sensor FP2 has an RRP of £99.99. It is currently out of stock on Amazon UK but launched at a reduced price of £82.99.
You can import the original FP1 from Aliexpress for around £40.
Amazon lists some other MmWave presence sensors that are quite affordable. These can be either ZigBee or WiFi, and these all appear to be the Tuya PS-HPS Human Presence Sensor. Hardly any of these have reviews.
The Tuya ZY-M100 is also listed under random brands for around £30 and generally has poor reviews.
The best alternatives are going to be normal IR sensors.
Aqara Motion Sensor P1 is battery-powered, incredibly easy to set up and just £25, but it is far less accurate, and the feature set is basic due to this.
You also have things like the Aeotec Multisensor 6. This is still just a basic IR sensor, but you also have temperature, humidity, light, UV, and vibration. This is around £50.
Overall
The Aqara Presence Sensor FP2 is an incredibly impressive piece of technology which has significantly superior functionality compared to normal IR motion sensors, and there are no other products that can compete.
This also works against the FP2. It is so sensitive it is much more difficult to set up than an IR sensor, and at over £80, it is an expensive investment.
Overall, there is nothing else quite like this, and if you are happy to take some time setting it up properly, it is superb.
Originally posted on mightygadget.co.uk – Follow on Twitter – Instagram – Facebook – Mighty Gadget Latest Reviews
Aqara Presence Sensor FP2 Review Rating
Summary
The Aqara Presence Sensor FP2 is an incredibly impressive piece of technology which has significantly superior functionality compared to normal IR motion sensors, and there are no other products that can compete.
If you are happy to take some time setting it up properly, it is superb.
Overall
85%-
Overall - 85%85%
Pros
- Incredibly accurate
- Significantly more functionlity than a PIR sensor
- No other device that competes
Cons
- Time-consuming to set up
- Expensive
I am James, a UK-based tech enthusiast and the Editor and Owner of Mighty Gadget, which I’ve proudly run since 2007. Passionate about all things technology, my expertise spans from computers and networking to mobile, wearables, and smart home devices.
As a fitness fanatic who loves running and cycling, I also have a keen interest in fitness-related technology, and I take every opportunity to cover this niche on my blog. My diverse interests allow me to bring a unique perspective to tech blogging, merging lifestyle, fitness, and the latest tech trends.
In my academic pursuits, I earned a BSc in Information Systems Design from UCLAN, before advancing my learning with a Master’s Degree in Computing. This advanced study also included Cisco CCNA accreditation, further demonstrating my commitment to understanding and staying ahead of the technology curve.
I’m proud to share that Vuelio has consistently ranked Mighty Gadget as one of the top technology blogs in the UK. With my dedication to technology and drive to share my insights, I aim to continue providing my readers with engaging and informative content.
Last update on 2025-07-12 / Affiliate links / Images from Amazon Product Advertising API

